C5
The professional
multiband compressor
for Potato
What is a Multiband Compressor
and why do I need one?
Potato includes a very exclusive sound processing tool: a 5-band Compressor, which allows you to finalize your voice sound as it is done in professional broadcast studios. The multiband compression will help you to define the identity of your stream and bring your sound, especially your Radio Voice, to a professional level.
The C5 is basically a set of 5 identical compressors, which process each their own definable frequency range. One for the bass, one for the lower mids, one for the middle mids … you get the picture.
Why do you need this? You don´t – until you do.
Usually, a compressor will be processing a single channel – let say the one with your voice – to make it louder and more assertive in the mix, so it can triumph over all the other noise, which is going on at the same time.
But there is always the final mix. Even when all parts are perfectly mixed together, this masterpiece needs to play on a podcast or radio: it needs to be louder, more punchy and at the same time it should not overload at any given time. A single compressor or limiter can help, but this is not what you really need. If a part of the signal is too strong – especially something like a bass drum – the compressor will kick in and starts to compress the complete signal in the rhythm of the drum. The so-called pumping happens!
The C5 comes to the rescue. Now you can just compress a boomy low end and let the higher frequencies untouched. This prevents bass peaks from reducing the entire signal.
Or you have a problem with your speaking voice: some nasal sounds are nasty and loud, so the Compressor can kick in on exactly this frequency to flatten it out. With the C5 you can create your unique and professional Radio Voice.
Example for 5 frequency bands with different compression settings (green). The bands show typical instruments & voice content in their prominent frequency ranges. With compression the loudness of these ranges can be controlled, so in the end it sounds like you need it to sound: easy to understand, more or less bass, no pumping. By compressing the range of your voice, you can bring it to the front, make it more audible and get the pro Mic sound of radio productions.
The effect provides extensive editing options across multiple frequency bands. The danger of pumping and other compressor side-effects can be managed. For instance, the C5 can prevent a level peak in the bass range from overpowering the entire signal. Additionally every frequency band comes also with a limiter. This is a game changer for your sound. Now you can protect your signal from overloading spikes in a special frequency band and at the same time, make just this part of the signal – e.g. the mid range with your voice – louder. Wow!
If you know, how to operate such a powerful tool, you can improve your mix – dramatically!
Enable the C5
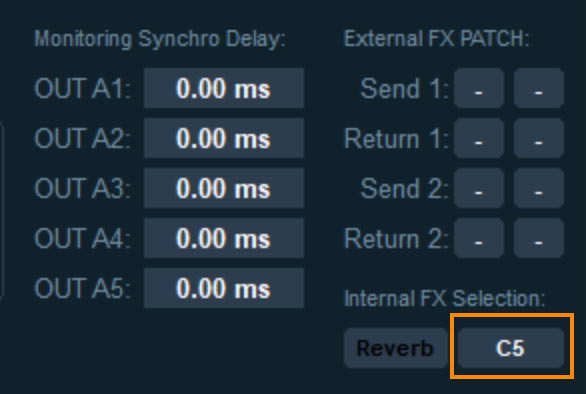
Open the Potato settings dialog and look for the “Internal FX Selection”.
Exchange the Delay effect with C5 (click).
Next Level Sound Processing
How to work with the C5
The C5 effect edits the dynamics with up to five independent frequency bands. Your entire mix is split into individual frequency bands and edited separately for each band.
The combination of the individual bands is 100% phase-neutral, and thanks to the used FIR Filter technique, no discoloration of the frequency response occurs. In other words: If there is no dynamic editing in the individual bands, the signal is split into the bands and then reassembled, your mix will be perfectly compiled to the state it was before.
Important: Routing the Input Channel Strip signals to the C5
The C5 in Potato is realized as an AUX Send effect. Experts will ask, why? Usually Compressors are used as insert effects, where the whole signal is routed through the effect. Using an Aux send, the signal splits: a part goes to the Aux effect and the unprocessed part goes directly to the output Mixbus.
However, to improve the Mic sound and generate the “Pro Radio Voice”, Potato realizes a dedicated and additional C5 Mixbus via the Aux send path. This way you can create a C5 mix BEFORE and feed the punchy C5 mix in EVERY output mixbus, while still mix it with non-C5-processed audio (no-voice channels).
This means, to use the C5, you have to:
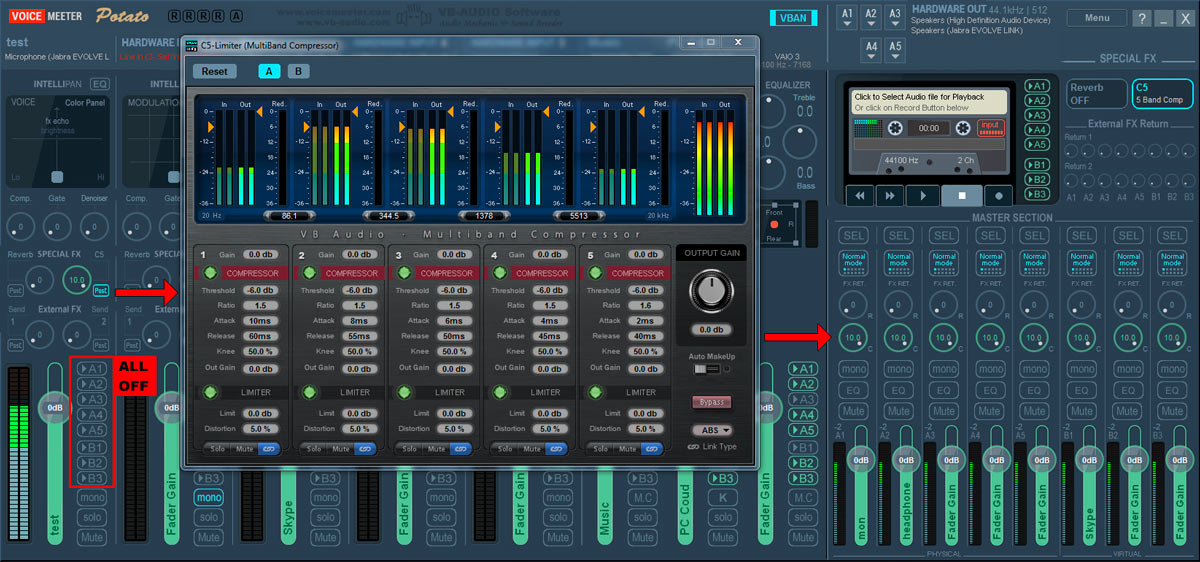
a) Turn off any bus assignment in the strip, which you want to process through the C5
b) Turn on the Post (Fader) button on the C5 send button.
This way the whole strip signal is going to the C5 and the strip fader still controls the volume of your input, e.g. your Microphone.
Otherwise you end up with two signals in the mix bus (A1, A2 …): The C5 mix via the Aux Send plus the direct path from the input channel to the bus!
So if you use the C5 – always turn of the bus assignments, which get a C5 return signal.
For a detailed description of the necessary routing please see the section on the bottom of this page.
Frequency bands, Peakmeters and A/B-Comparison
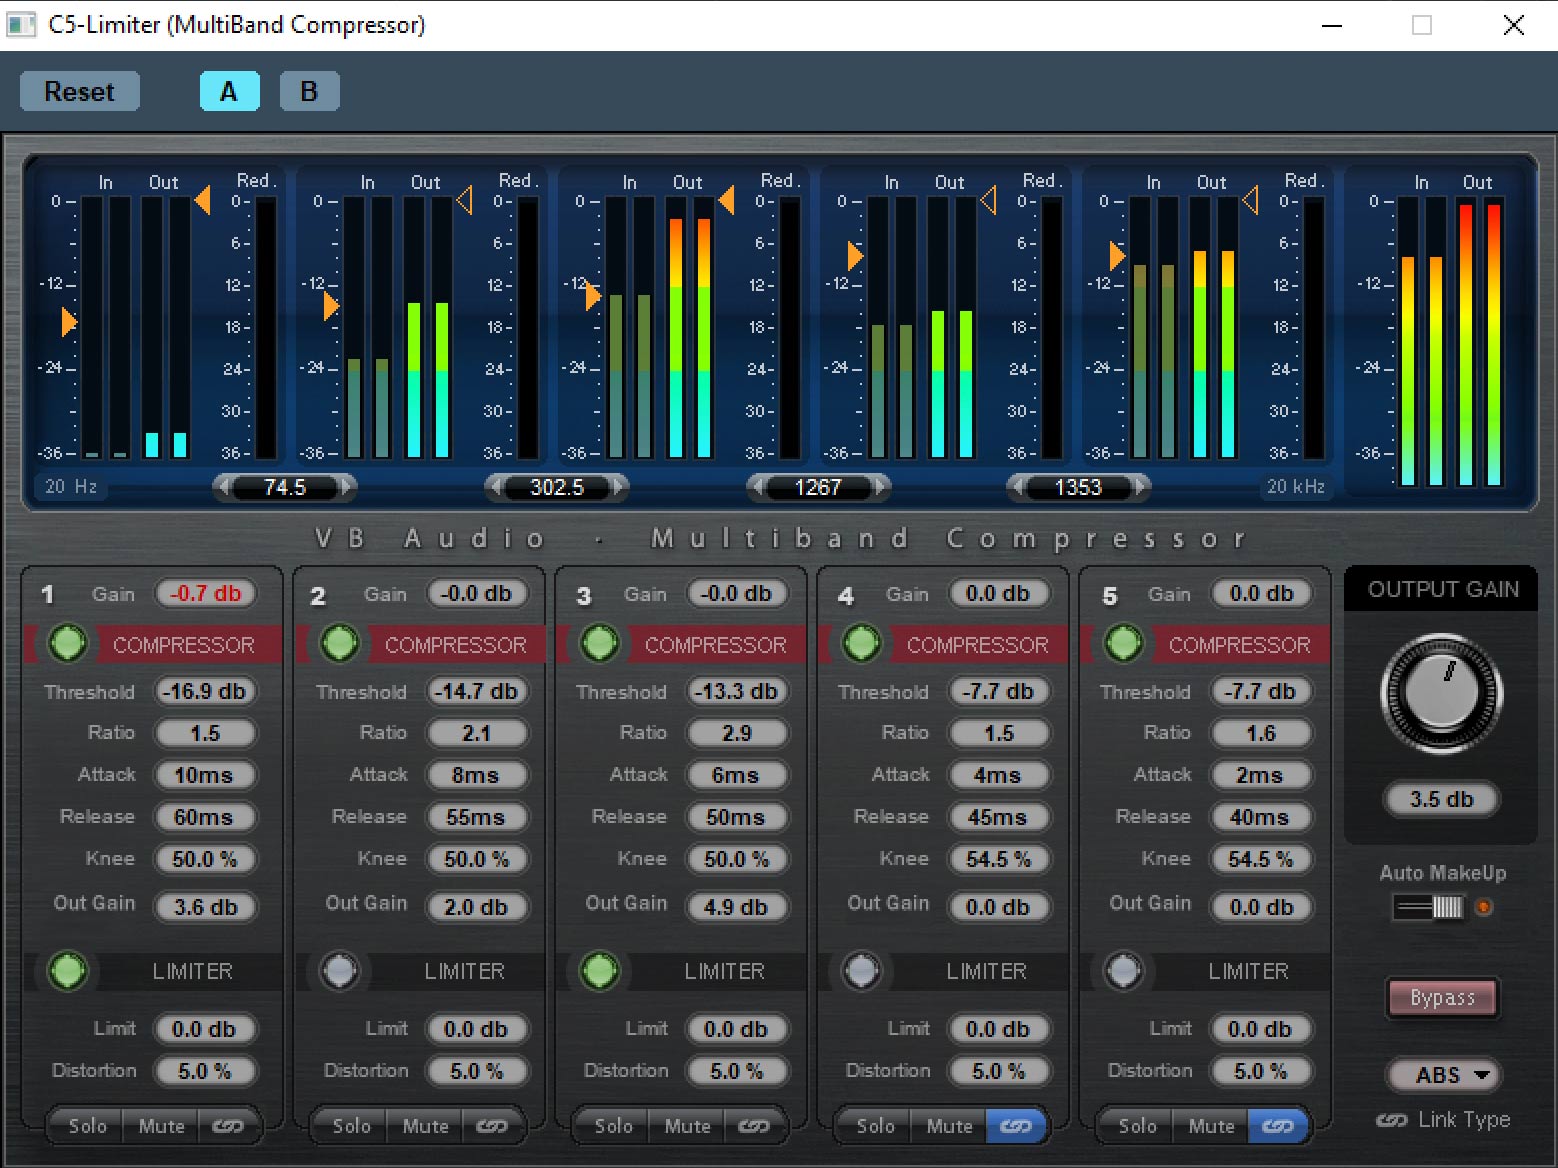
Click and drag on the small sliders below the peakmeter in order to change the separation frequencies for the individual filter bands. The separation frequency is shown on every slider.
The peak meter in every channel show the input and output gain of the split frequency ranges. This way you can easily see the result on the volume of the compression.
Compare diffeent settings with the A/B buttons on top of the dialog.
Compressor controls
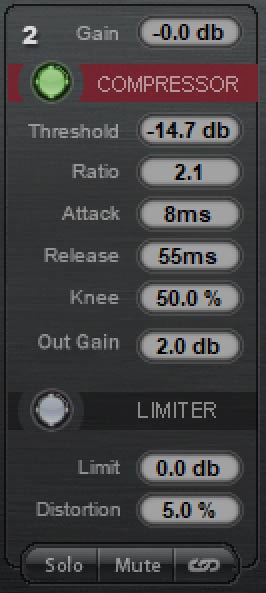
Gain (dB): The input gain of every compressor (=frequency range).
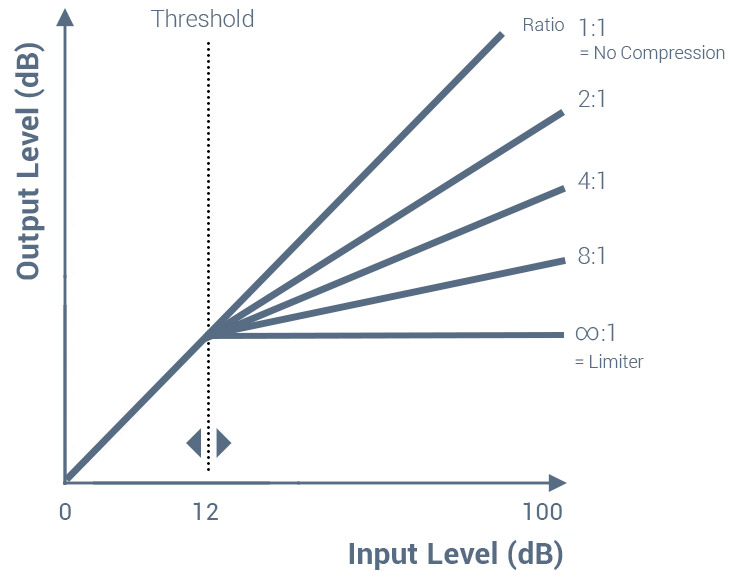
Threshold (-dB): The value at which the compressor starts working. The lower this value, the more it affects and compresses your sound. If the value is set to 0 dB it does not do anything.
Ratio (factor): Strength of the compression effect (1.0 = no effect). How much the compressor is pushing the parts, which reached the threshold, down. If you use a high value and press the mountain tops down, you can use a higher Gain, to bring the whole part of the mix up and make it louder without clipping. This is the trick of modern music mastering, especially with rock and techno music, to sound much louder and produce deep, stomach-shaking drums.
Attack (ms): Sets the time frame between the crossing of the threshold and the maximum extent of the effect.
Release (ms): Sets the time frame between the falling below the threshold and the complete dissipation of the compression. So how quickly the compressor sets back to the original values.
Knee (%): The value defines how the reduction sets in, when the signal crosses the threshold. More soft (gradually) or hard (abrupt). A hard knee curve creates a sudden change in the slope (ratio) that begins at the threshold.
Out Gain (dB): A compressor decreases the volume, as it down regulating peaks, which are crossing the threshold. In order to keep the audio signal as loud as it was before the compression stage, turn up the ‘Output Gain’ on your compressor so input and output volumes match up. Increase the gain, to increase the volume of this frequency range. Also check the “Auto Make Up” setting in the master area of the C5.
Solo: Press this button to monitor a selected frequency. For instance, you can locate a critical frequency range of a mix before editing the compressor parameters.
Mute: Mutes the selected frequency range. This way you can also completely filter out unwanted frequency areas from the mix, e.g. a rumbling sound.
Link: How the band parameters are linked together when edit them.
Main section (on the right)
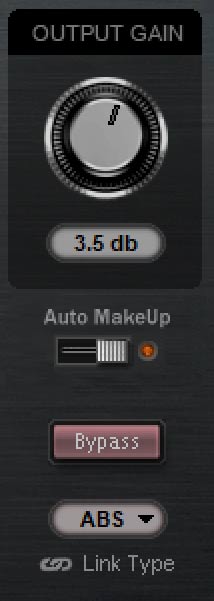
Output Gain: With the main gain knob, you can control the volume of the C5 output. So for example, if you compress the bass and lower mid frequencies and achieve an overall more headroom of 6dB, you can increase the Output Gain with up to 6 dB without clipping.
Auto Make Up: The Auto Gain Make Up option brings up the compressed (quiter) signal automatically, trying to get as close as possible to 0 dB.
Keep in mind, this option can produce overloads and picks if it’s set on a slow attack/fast release setting (Drum hits!), because the Make Up Gain brings the whole signal up near to 0dB, but the quick hits escape the compression and can clip 0 dB.
Bypass: Switches the C5 completely on and off. Use this button to quickly compare your compressor sound to the original signal.
Link type: How the linked frequency ranges are linked.
Compressor Curves
The Ratio defines the strength of the compression. Once the signal crossed the threshold (e.g. -12 dB) the compressor is pushing the parts, which crossed the threshold with the selected ratio down.
5 x integrated Limiter
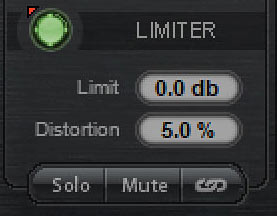
A Limiter is important, because a compressor with applied gain can produce very high audio energy, the so-called perceived Loudness is higher. The Limiter ensures, that no quick transients or unexpected sound peeks produce nasty crackles or damaging noise.
Distortion: This setting, acting on the limiter reaction rate, creates a kind of “soft and warm” effect, which produces the typical overtones, when an analog circuit or magnetic tape is driven into overdrive or saturation.
The C5 Mixbus explained
Route Input Channel Strips exclusive as post fader Aux sends!
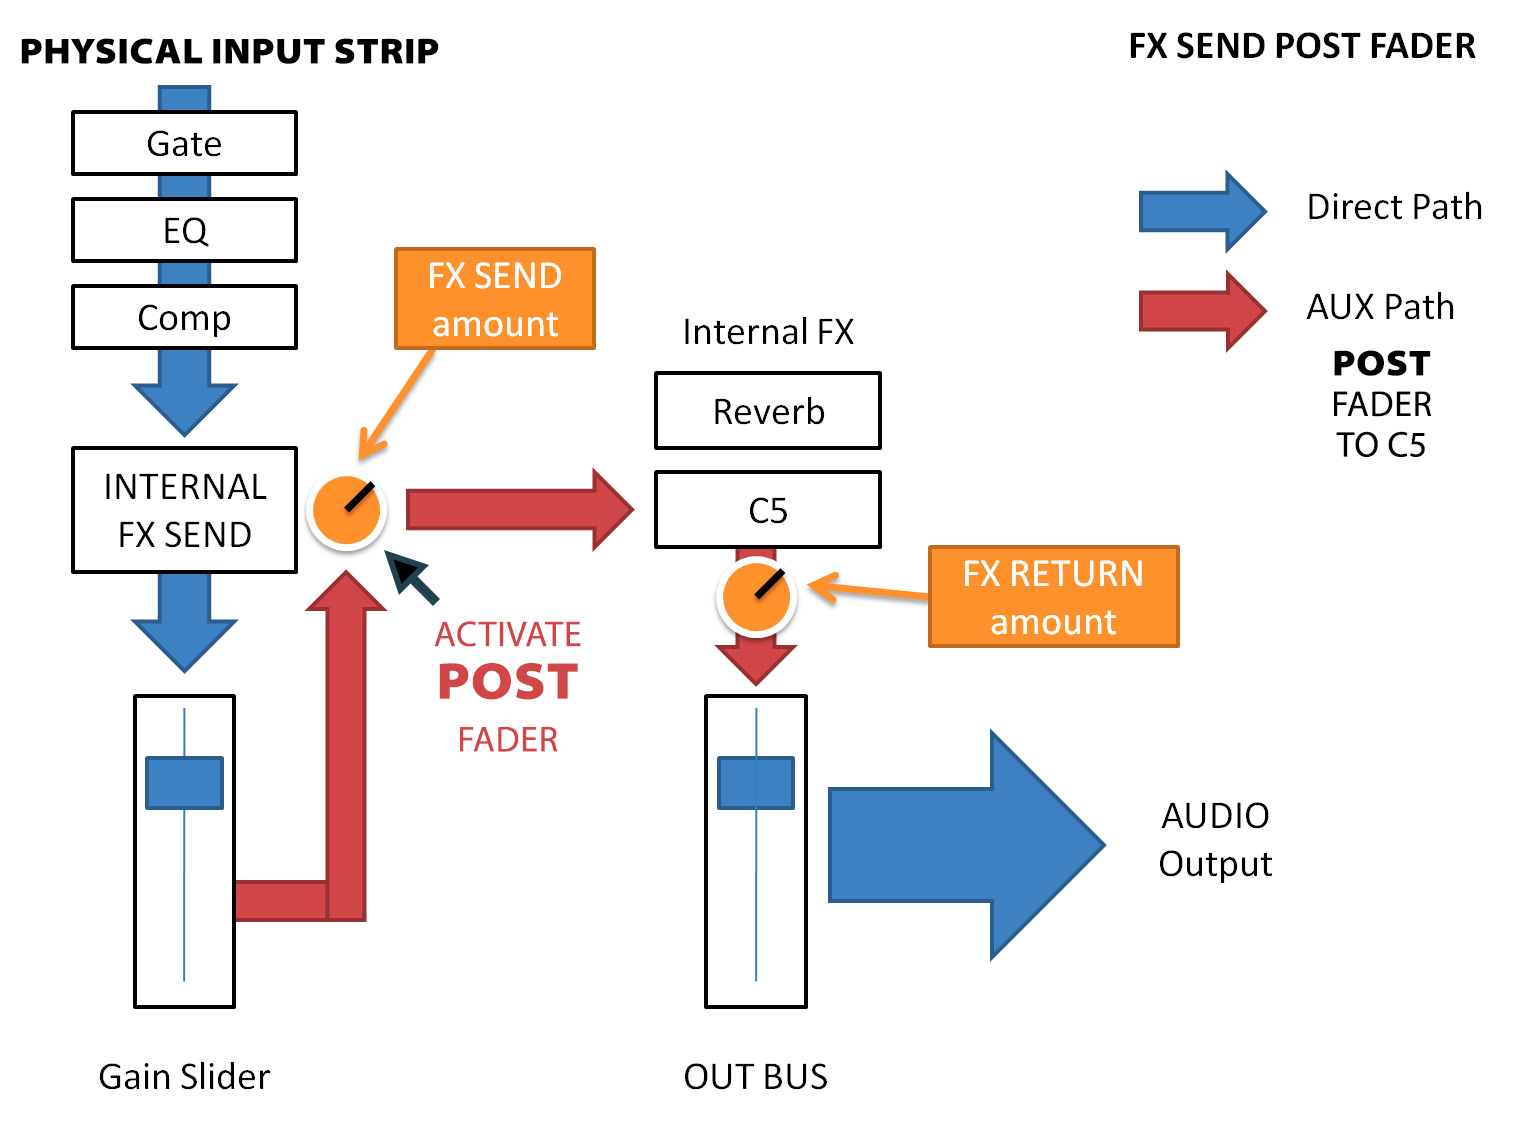
The C5 Multiband Compressor is realized as an AUX Send effect. This way you get an additional mixbus from every input strip to the C5!
To compress your full input channel signal, e.g. your Mic, you need to:
a) activate the post fader button in the input channel and
b) switch off all bus routing buttons.
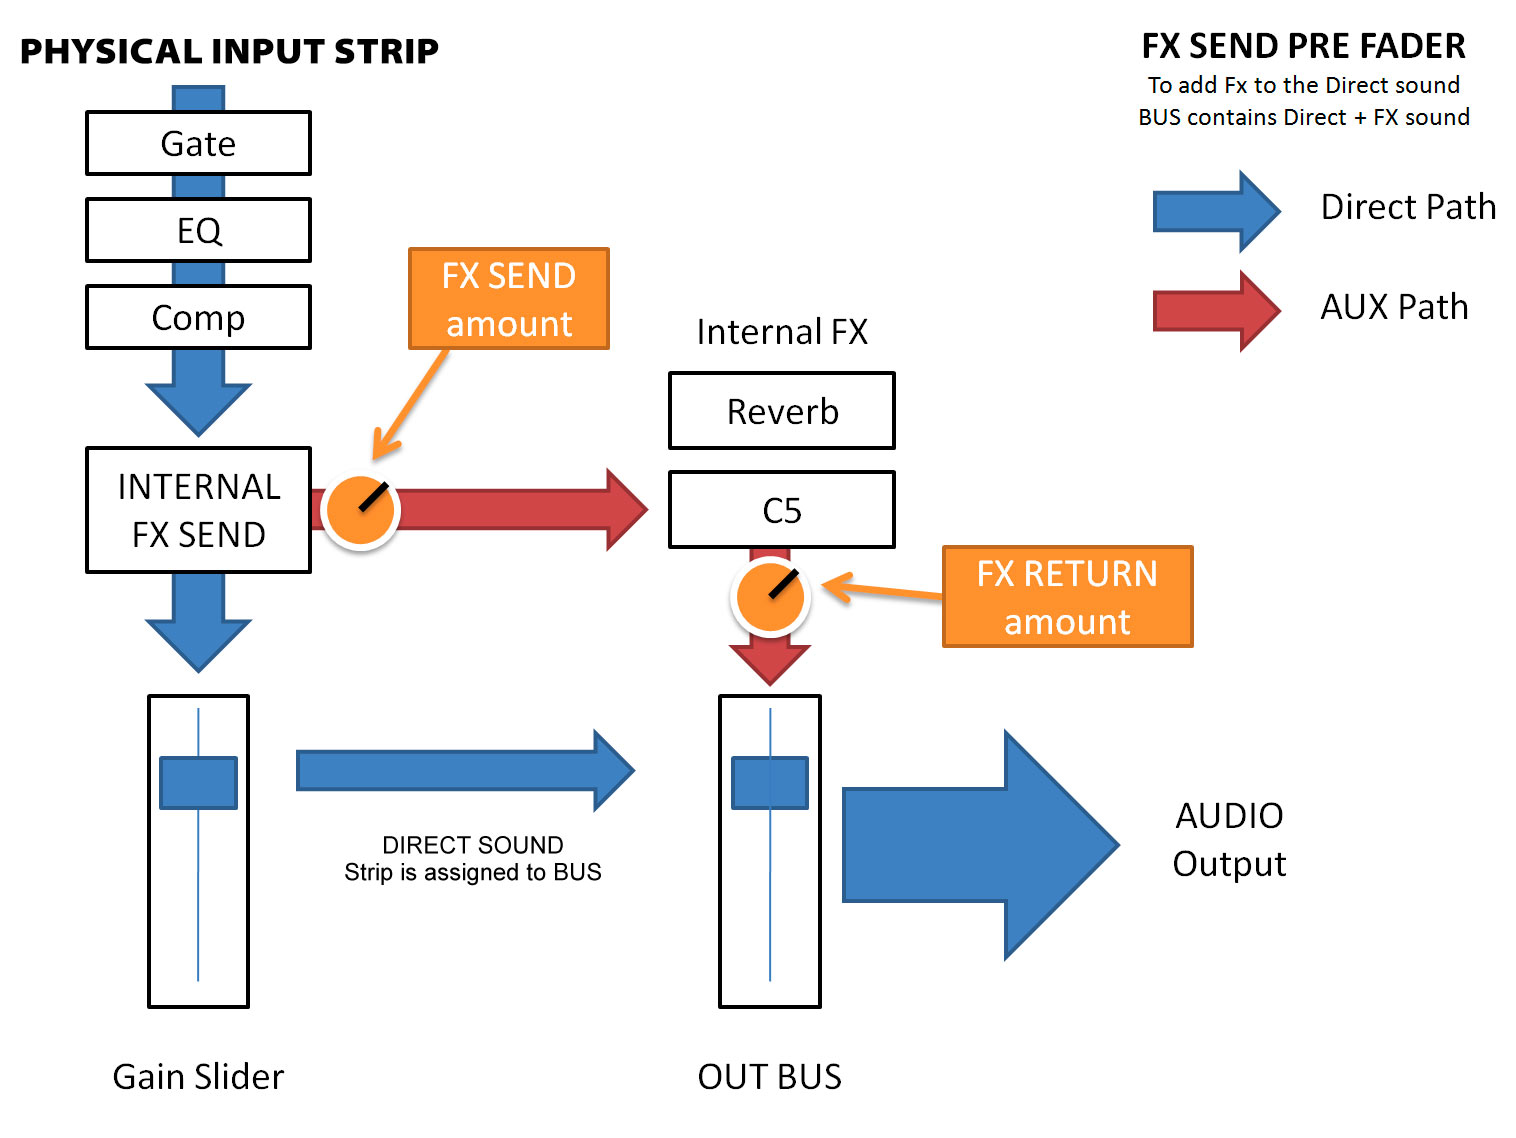
This way the C5 gets exclusively (!) your input gain with the fader gain applied to the channel audio. Otherwise the fader is ignored, because the C5 gets the pre-fader signal. Please have a look on the routing to understand the working principle:
Another two routing options:
FX Send Pre Fader
The C5 Mixbus gets the channel signal exlusively – no direct assignment to any Mixbus (A1, A2 …).
But the Fader gain (Volume) of the input channel is completely ignored. So if you raise or lower the volume of your Mic with the fader, nothing will happen. On the other hand, the FX Send gain is applied to the C5 signal.
FX Send Pre Fader + Direct Bus routing
The C5 Mixbus gets the channel signal, but the channel audio also goes to the assigned Mixbus (A1, A2 …).
So you end up with two signals in the same Mixbus: the C5 compressed audio (e.g. Mic Voice) and the direct audio from the same input going to the assigned Mixbus. Both signals will be mixed, which could produce strange results.
This is usually not, what you want! So if you use the C5 – always turn of the bus assignments, which get a C5 return signal.


