How to optimize your latency in VoiceMeeter
Voicemeeter latency is depending on different parameters and the overall configuration of your PC.
1. Audio Latency is always a trade off between stability and lowest possible latency without crackles or dropouts. Since an optimal settings is not applicable to all PC Setups, you may have to experiment to find an optimal configuration with the best compromise between latency and audio stream stability.
2. Latency depends on the size of the buffers, which are processed by the system. Audio is sent as a continuous buffer stream through Windows, RAM and CPU. The buffer size is measured in samples (= parts of the audio stream).
A buffer size of 256 samples at 44.1 or 48 kHz results in a latency of 5 ms. This is basically the minimum latency we can expect to manage reliable from the Windows Operating System. Below 256 samples the risk of dropouts and sound distortions is high.
1
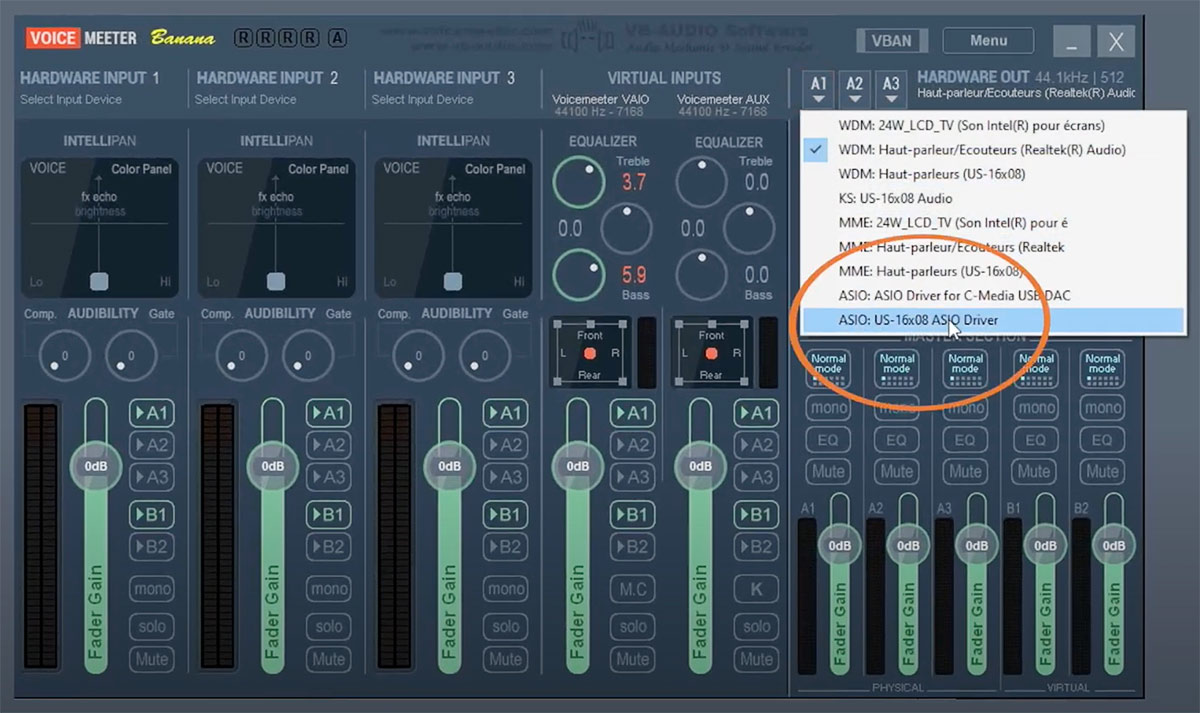
Select your best ASIO audio interface as Output A1.
Select the ASIO driver of your best and most stable device as output A1.
This will assign the main audio stream to the device with the lowest latency.
Why ASIO?
The lowest latency is usually delivered by an ASIO driver, configured with a buffer size around 256 samples.
If there is no ASIO Driver present, the WDM/KS device can be used. Some of them could work with 256 sample buffer, without stability issues, but some may not. Keep in mind, MME drivers are usually very stable, but cannot deliver a low latency, like ASIO.
![]()
Keep in mind, there are huge latency differences with hardware audio interfaces. Some companies, like RME, have a proven track record for the most stable drivers with the lowest latency. Such interfaces can deliver a much lower sample buffer sizes, than others. The quality of hardware and ASIO drivers are more important, than the connection protocol (USB2, USB3, Thunderbolt, PCIe), e.g. RME USB2 interfaces outperform other manufacturer´s Thunderbolt and USB3 devices.
2
VoiceMeeter audio settings
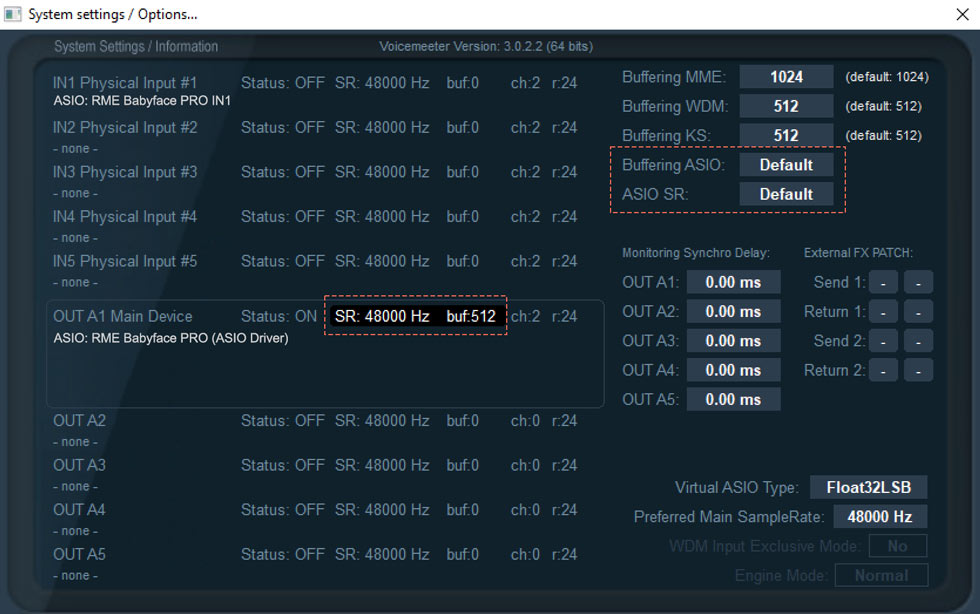
Per default VOICEMEETER is using the samplerate (SR) and the buffer size of the selected audio interface in Output A1. This is the best and most stable option, so you don´t need to change these settings.
In this case VoiceMeeter gets the latency parameters from the settings in the ASIO Control Panel of your selected device (e.g. RME Babyface PRO).
Usually 512 samples are stable, but you can experiment with the ASIO buffer and choose a bigger or smaller size in the ASIO Driver Settings (e. g. 256 samples).
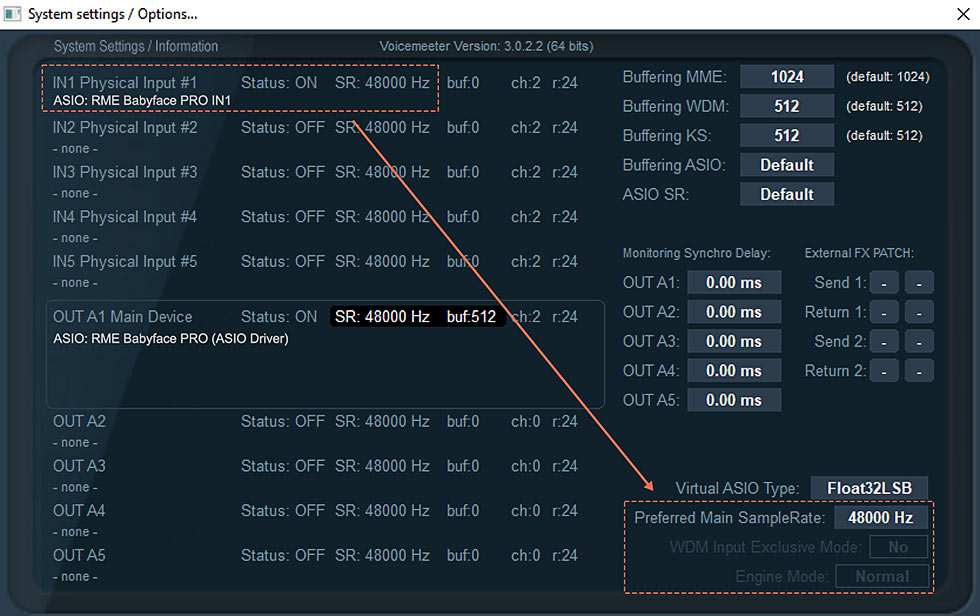
The main sample rate should be identical to the IN/OUT samplerate. If you don´t change the default value, VoiceMeeter is using the value from your main output A1 (e.g. 48.000 Hz).
![]()
WDM Input Exclusive Mode and Engine Mode are expert settings and can be changed in the Windows registry only. Both settings are related to WDM driver only (WASAPI) and are not concerning ASIO. They are experimental, so in case of problems, we recommend to fall back to the default settings (No / Normal).
3
Optimize your audio apps
1. If your apps provides a sample rate setting, set it to the same sample rate as used in the ASIO Settings Panel of your driver and VoiceMeeter.
2. Professional audio programs, will get the same buffer size than Voicemeeter main stream when connected to Voicemeeter virtual ASIO driver (optimization is automatic here). To get more stability, increase the buffer sizes.
3. Finally optimize your overall Windows system for audio latency. Traditionally there are full libraries of tips and tricks, how to do this. A working solution is to simply stop all unecessary background tasks and other CPU taxing apps, like web browsers and online apps. Check the Windows task manager for background activity (CPU and RAM usage).

