How to
share your PC Mic
to a Mac
How to share your PC Mic
to a Mac
Learn how to
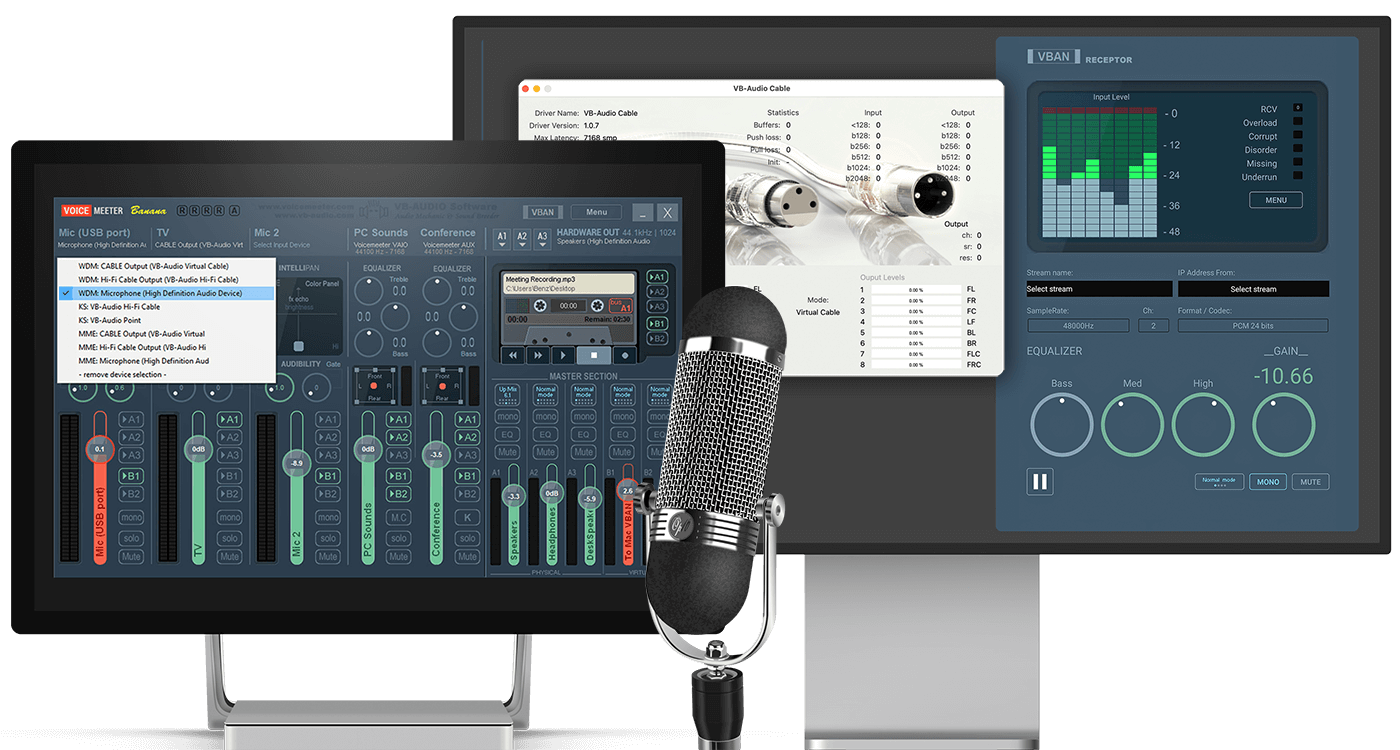
Now route the Mic signal with VBAN to your Mac.
Receive the VBAN audio stream in VB Receptor for Mac.
Send this Mic audio via VB Cable for Mac to any Mac application (e.g. Discord, Zoom, Skype …).
- VoiceMeeter
- Your Mic
- Receptor for Mac
- VB Audio Cable for Mac
1
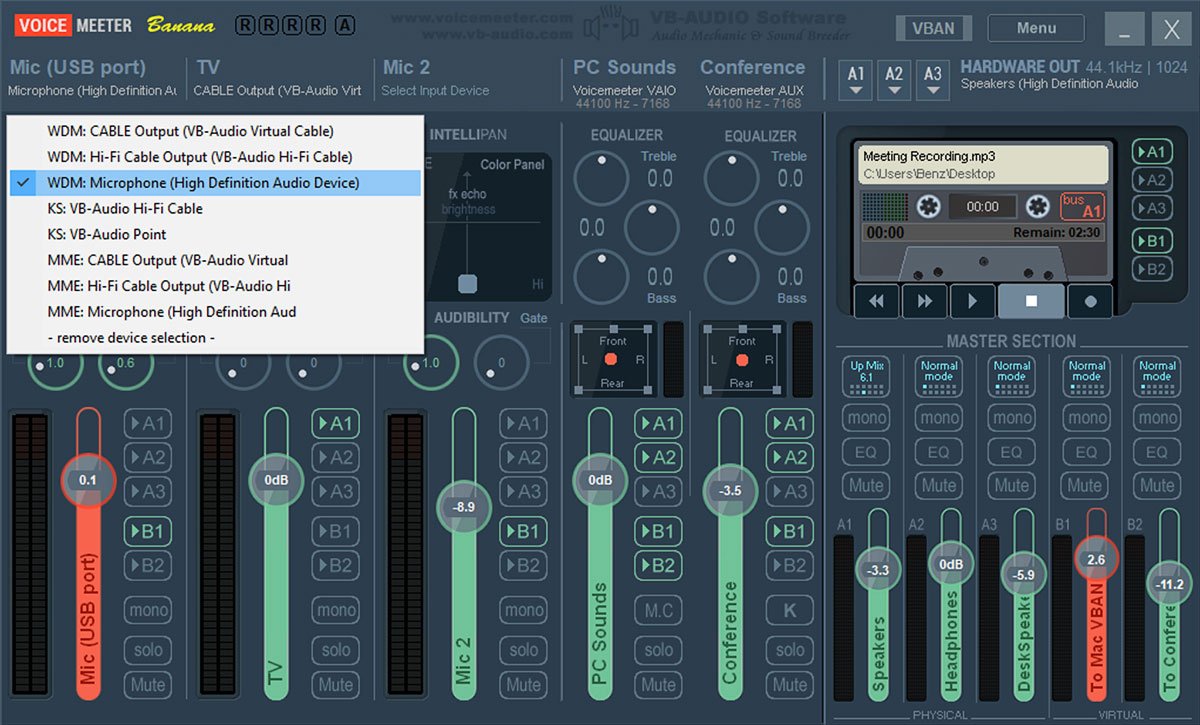
Select your Microphone on Input 1.
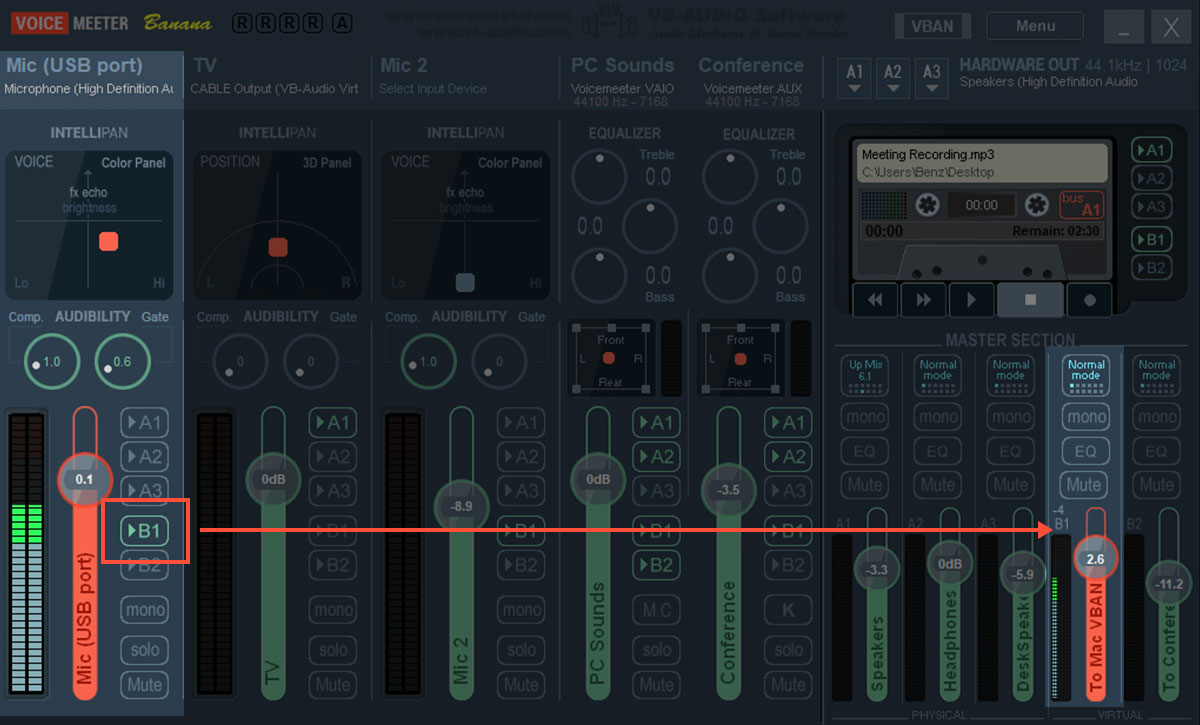
And route it to Bus B1.
Check the microphone signal. The peakmeter of channel 1 should show the incoming signal, when you speak into your Mic.
![]()
Your Mic or other audio hardware comes with its own driver(s). Select a WDM driver for the best latency and audio performance. A MME driver works too, but this format usually introduces a bigger latency. Use an MME driver only if a WDM driver is not present or does not work correctly with your hardware configuration (e. g. crackles).
Now send this Mic signal to Bus 1: Simply press button B1 in channel 1. The peakmeter on Bus 1 will show your Mic signal as well, when you speak. You can of course send the Mic signal to all other Buses, e.g. your headphones on Bus A1.
![]()
Why Bus B1? Well, Bus B1 and B2 are virtual outputs. Unlike Bus A, which are hardware outputs (e.g. headphones), every Bus B they connects to software – or in our case can stream the signal to the network via the integrated VBAN protocol.
2
Setup a VBAN stream from Bus B to the Mac
Enter the IP Address of your target MAC
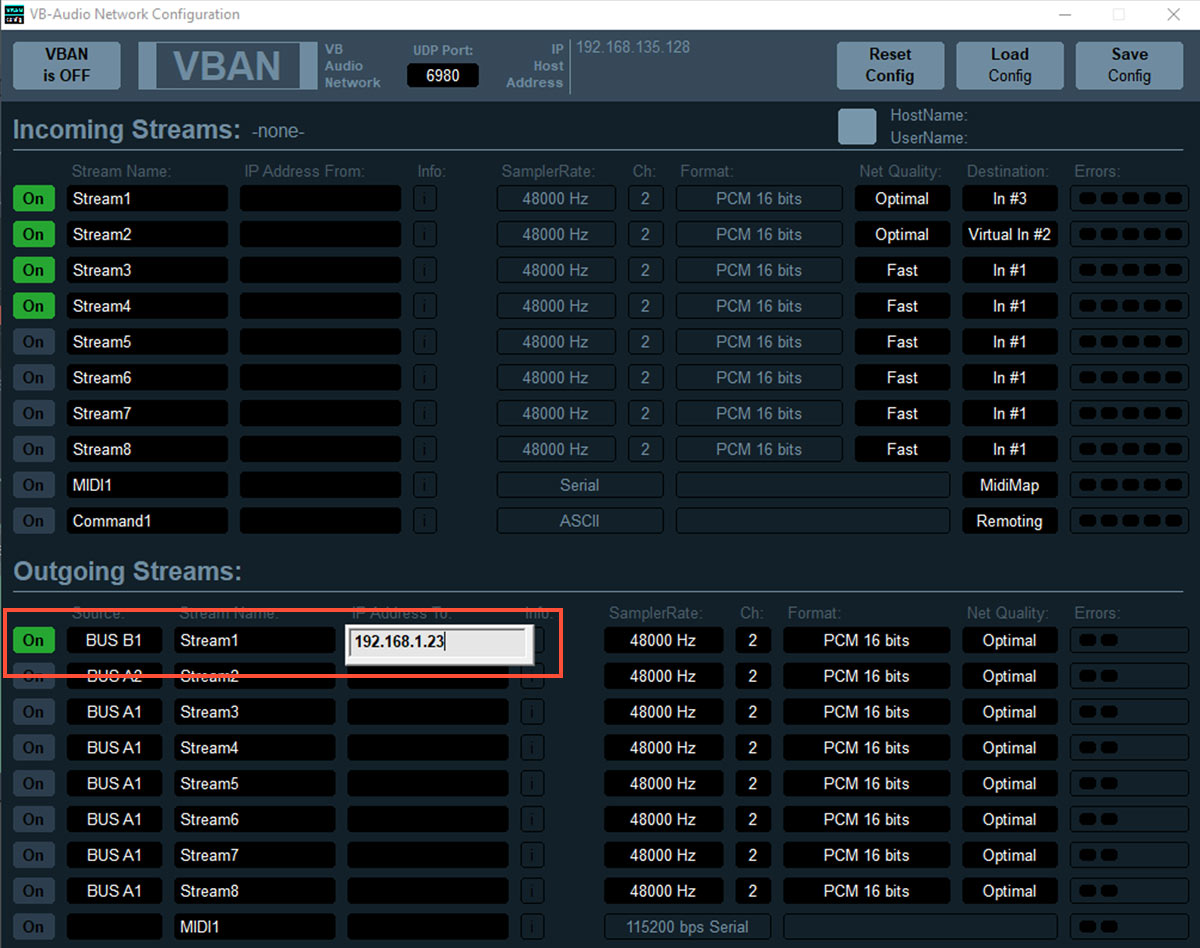
Open the VoiceMeeter VBAN setup dialog (click on the VBAN button in the upper right corner).
In the section “Outgoing Streams”:
a) Select BUS B1 as source
b) Click the ON button
c) Enter the IP address of your Mac.
![]()
The IP address of the Mac can be found in the Mac System Preferences (the grey cog icon), Network (blue globe icon). Inside you find somethiong like: “Ethernet is currently active and has the IP address 192.168.1.23.”
3
Mac Setup: Choose the incoming VBAN stream in VB Receptor for Mac
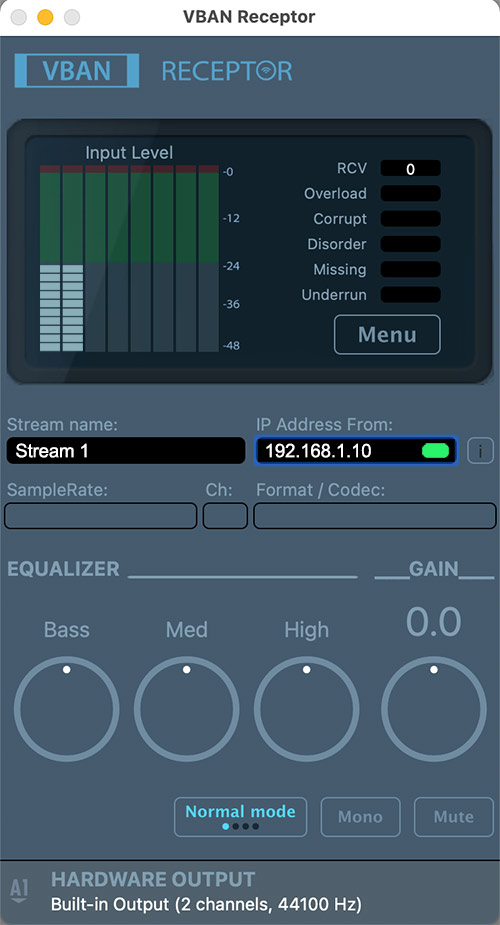
Select the incoming VBAN Stream
Enter the IP address of your PC to receive the incoming stream with the Mic signal from your PC.
You can find the IP address of the PC in the Windows Network settings (right click the Windows icon / Settings / Network / Ethernet or WIFI / click Network Connected text on the right column).
Note! Instead of VBAN Receptor VBAN Talkie can be used as well, to receive the Mic audio stream on your Mac.
Choose VB-Cable as output
On the bottom choose VB-Cable as hardware output for Receptor. This way the incoming VBAN Mic signal is simply routed to VB Cable.
![]()
If you did not already, install VB Receptor from the app store and VB Cable from our website on your Mac.
What is VB Cable? Is is simply a virtual audio driver, which presents itself as Mac audio input and output. It simply looks like an installed audio soundcard to the system. What makes it special: it provides the audio signal it gets to the system. This way, just like a real cable, you can send audio from any app output to all Mac apps, by choosing VB Cable as output.
4
Mac Setup: Select VB Cable as your DEFAULT audio input device
OR SELECT VB Cable as audio input for selected apps.
Now VB Cable carries your PC Mic signal. So simply select VB Cable as your default input audio device in the Mac audio settings. This way ALL Mac apps get this signal instead of the built-in Mic or soundcard of your Mac.
Alternatively you can assign the VB Cable Mic signal only to selected apps, which support an input selection, like Skype or Zoom:


