Setup a Mic with your ASIO audio interface
1
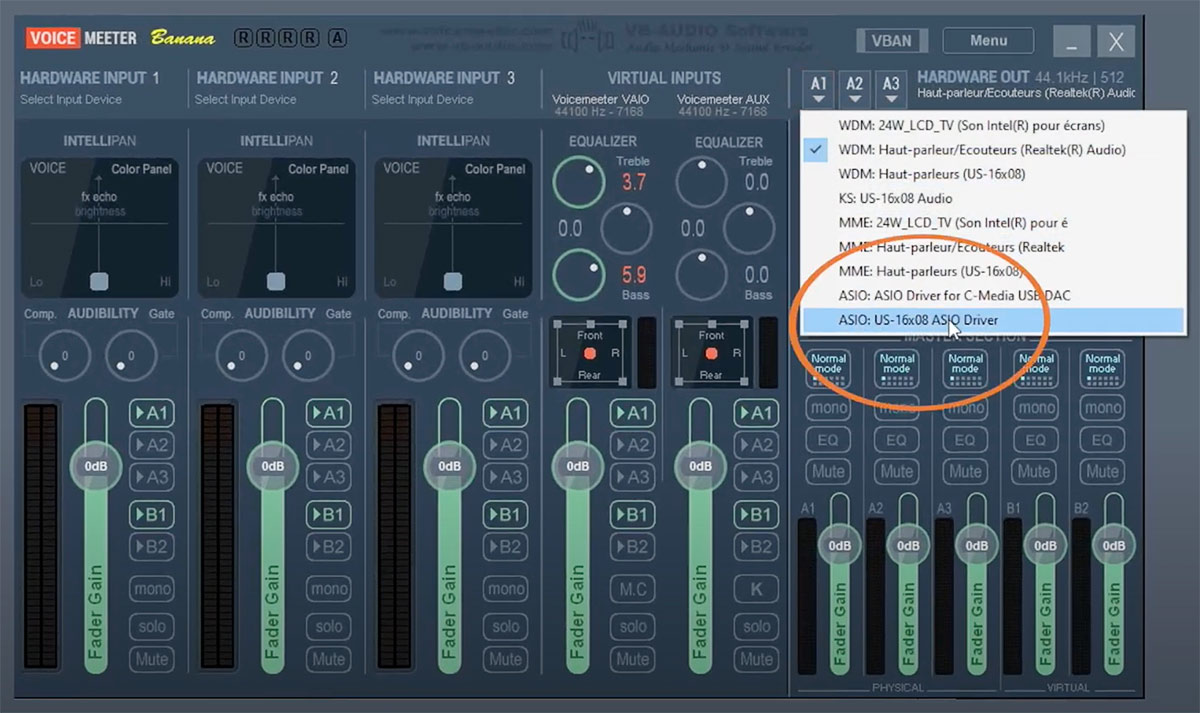
Set Your Audio Interface as Output
Select your ASIO driver as Output A1.
2
Connect the ASIO Inputs
to Your VOICEMEETER Inputs
Your ASIO interface has several inputs.
Patch all of them or only the Mic input to VOICEMEETER´s input channel strips.
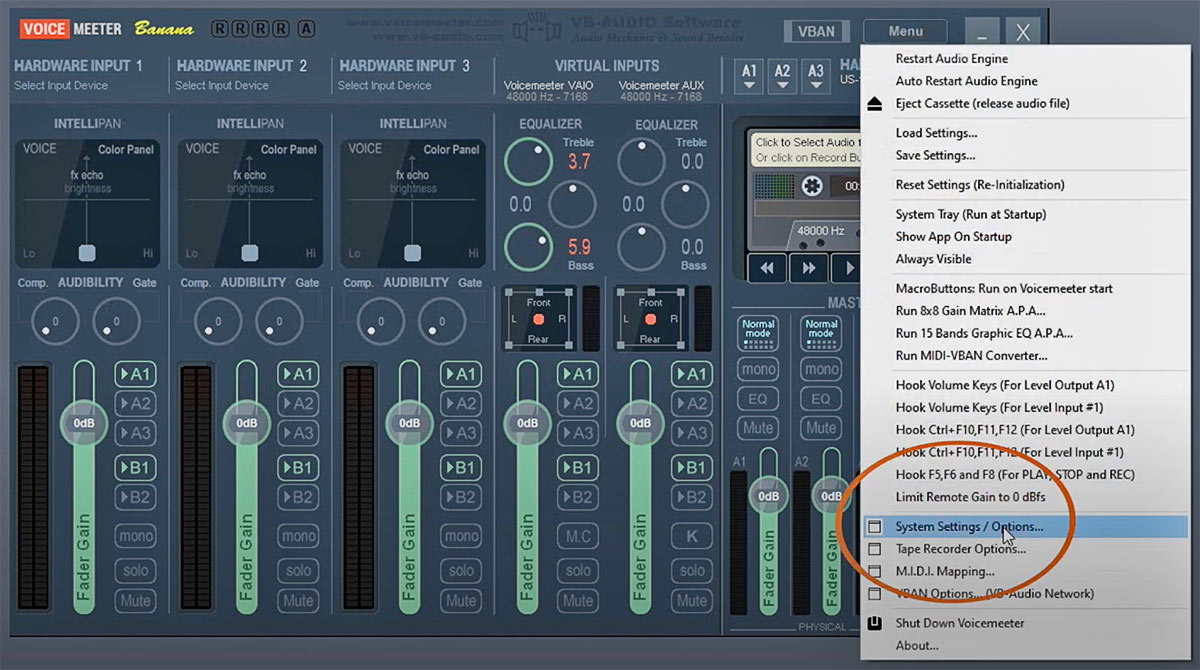
A. Open the VOICEMEETER “System settings/Options …” dialog.
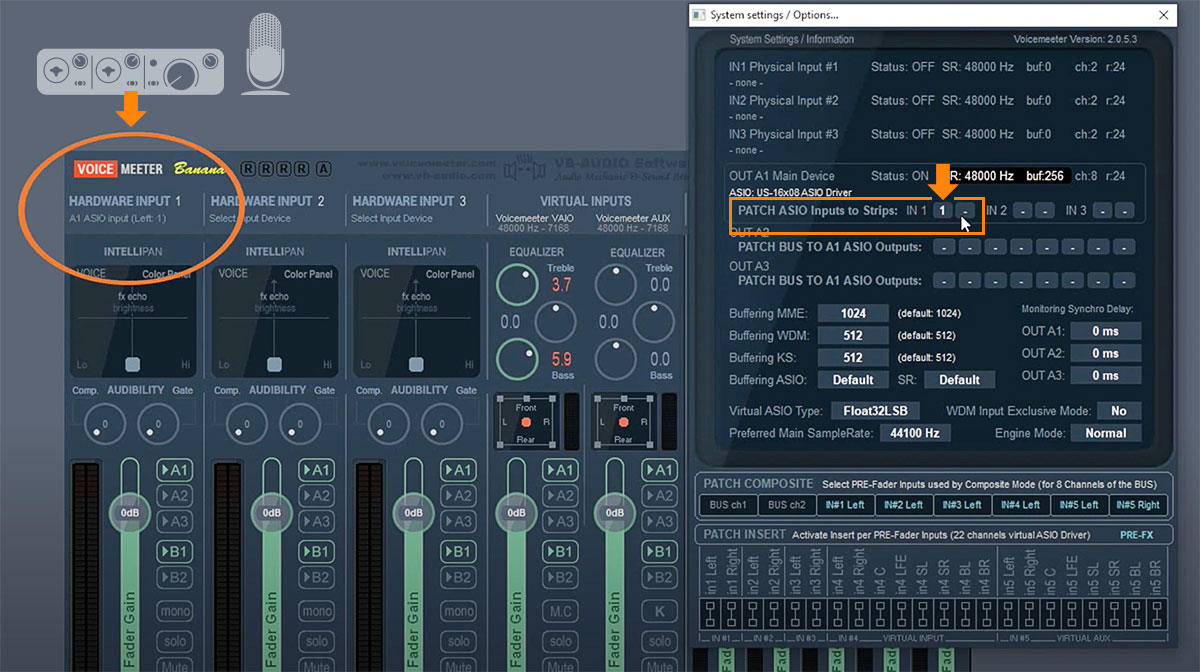
B. Patch the Mic ASIO input of your interface to a VOICEMEETER input strip:
After step 1 the settings dialog presents the selected ASIO audio driver as A1 Main Output device.
Select the input number in the IN1 L/R fields (“PATCH ASIO Inputs to strips”).
If your Mic is connected to input 1 of your audio interface, simply choose “1”.
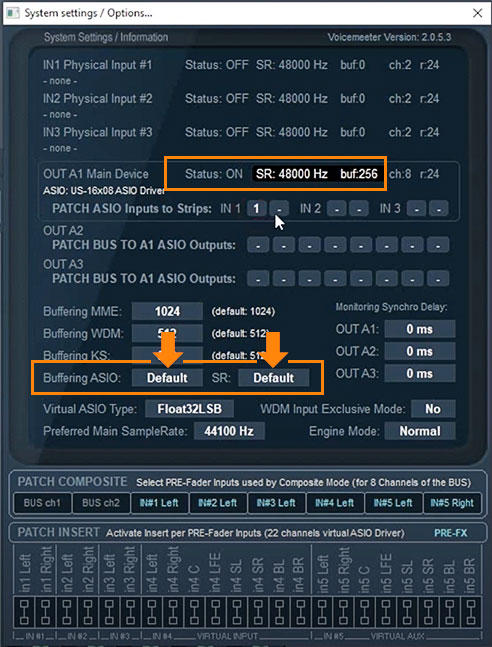
C. ASIO buffer settings:
Per default VOICEMEETER is using the samplerate (SR) and the buffer size of the audio interface. This is the best and most stable option, so you don´t need to change these settings.
Alternatively you can specify a different sample rate and/or a bigger buffer size.
Tip: Media should be played at their stored sample rate (e. g. 44.1 KHz for CD music).
![]()
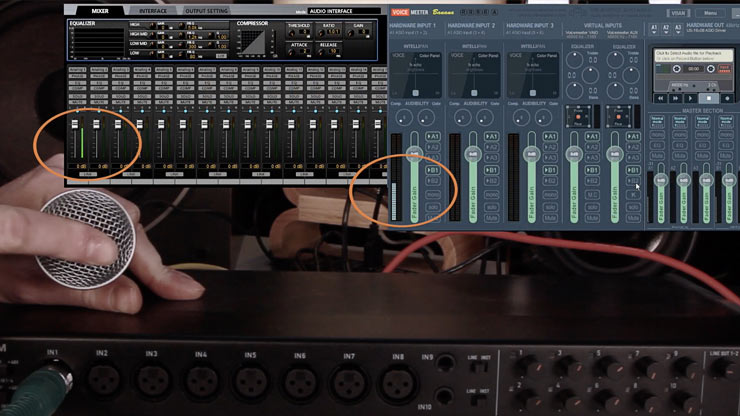
You can connect (= route or patch) all the inputs of your ASIO interface to VOICEMEETER´s input strips. If you just want to use the input with your Mic, only patch the number of this input to the strip.
3
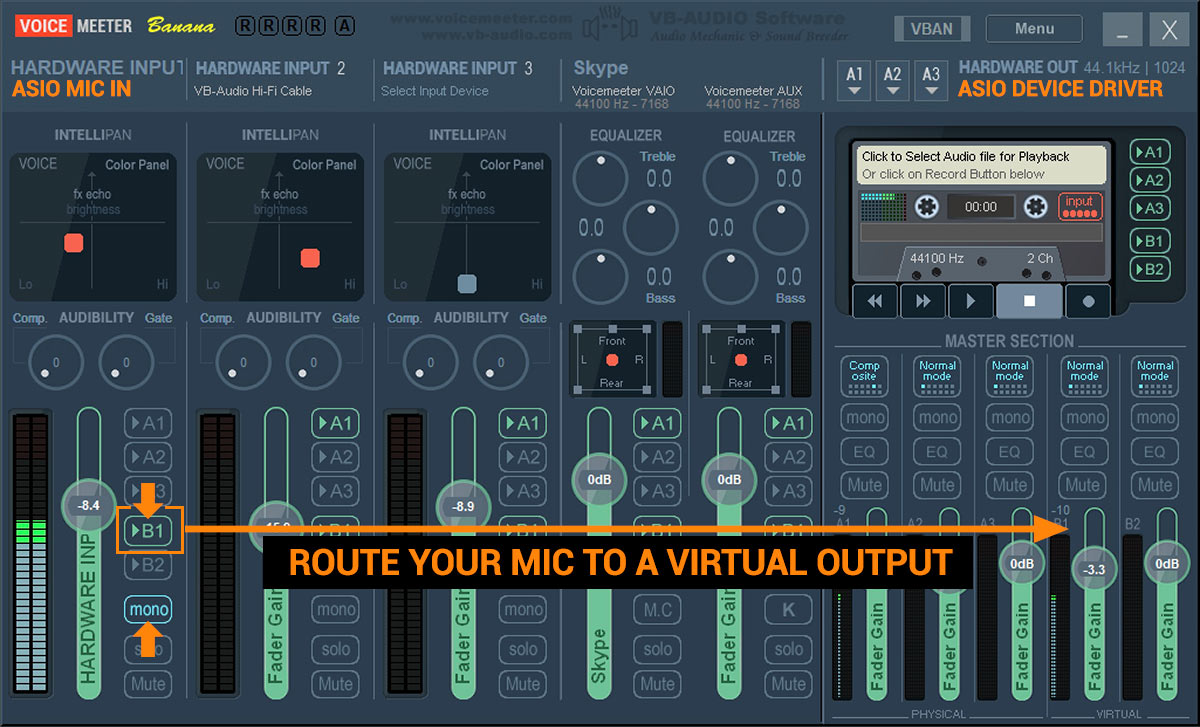
Route Your Mic to a Virtual Output
Route your Mic input to a Virtual Output (B1).
Turn on the Mono button on the input.
![]()
Your ASIO audio interface (e.g. RME Babyface PRO) usually comes also with MME/WDM drivers. To avoid device conflicts don´t use these MME/WDM (e.g. RME Babyface PRO MME/WDM) drivers on your input and output channels.

