Setup VoiceMeeter in Windows 11.
Enable Microphone access in Privacy settings!
Allow access to all VoiceMeeter devices!
1
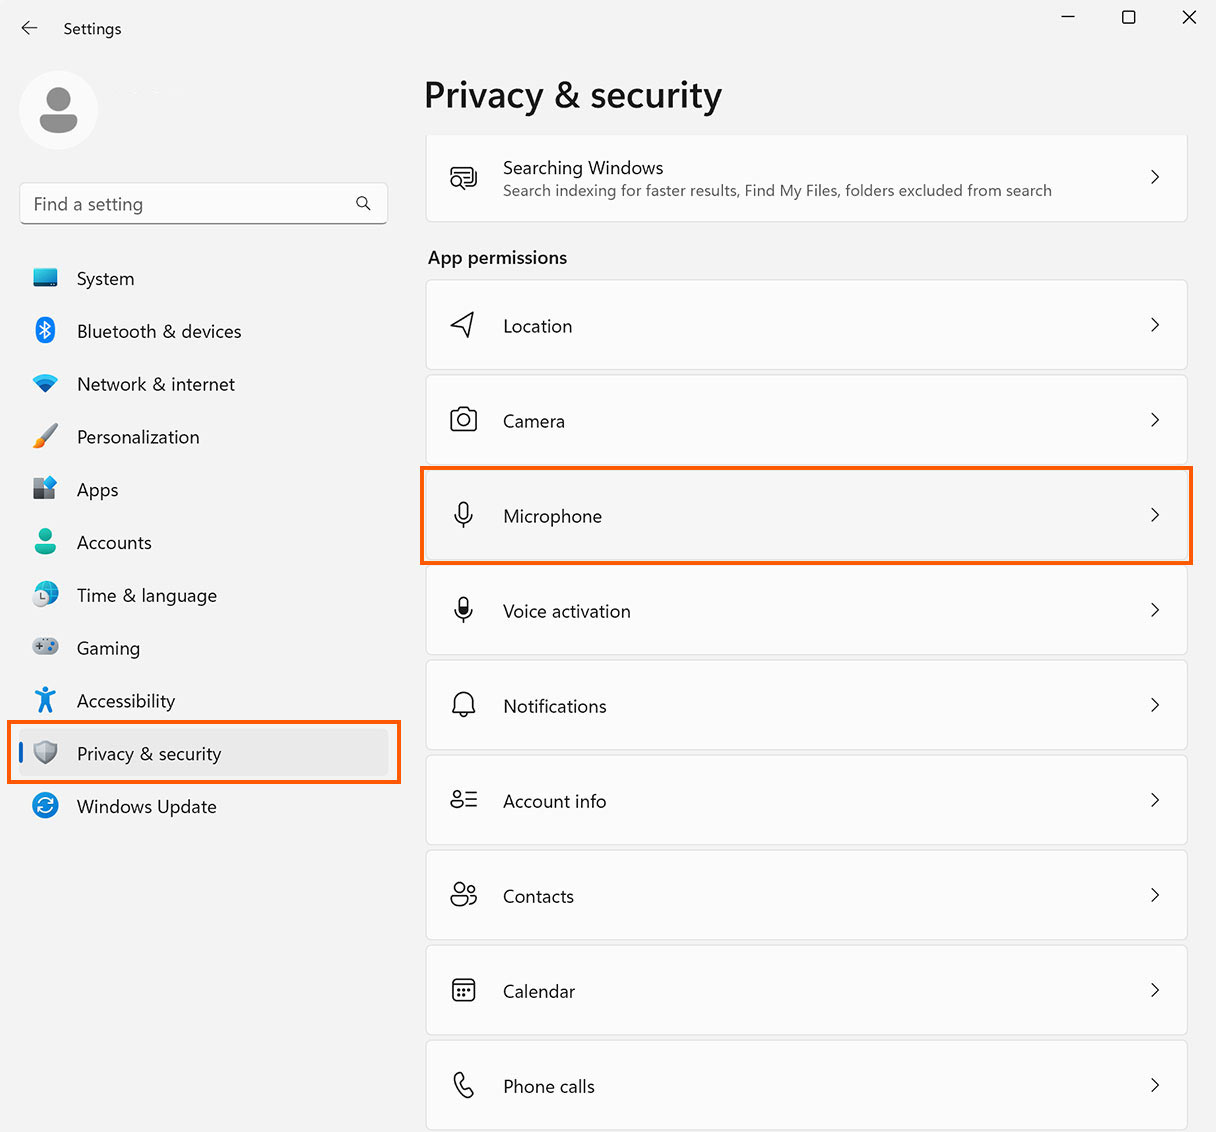
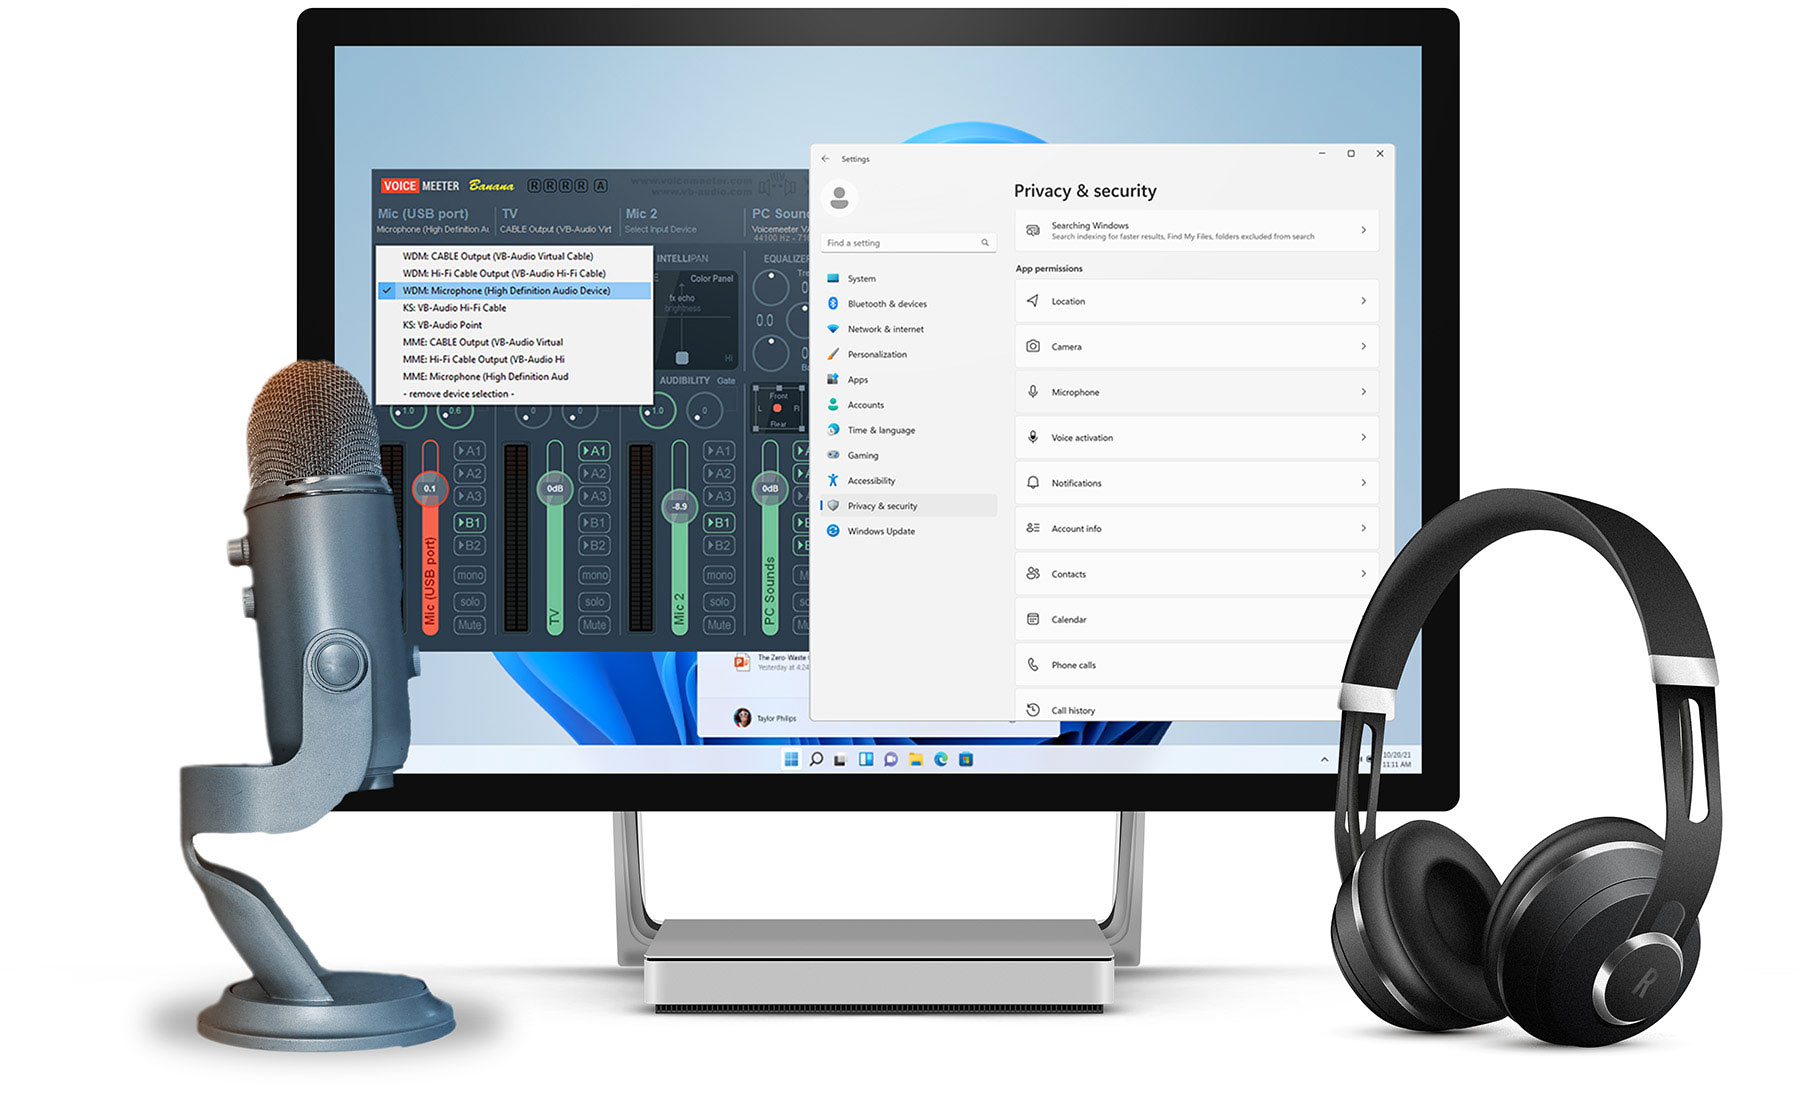
Open Windows Settings dialog and “Privacy & Security”
Select “Microphone”
2
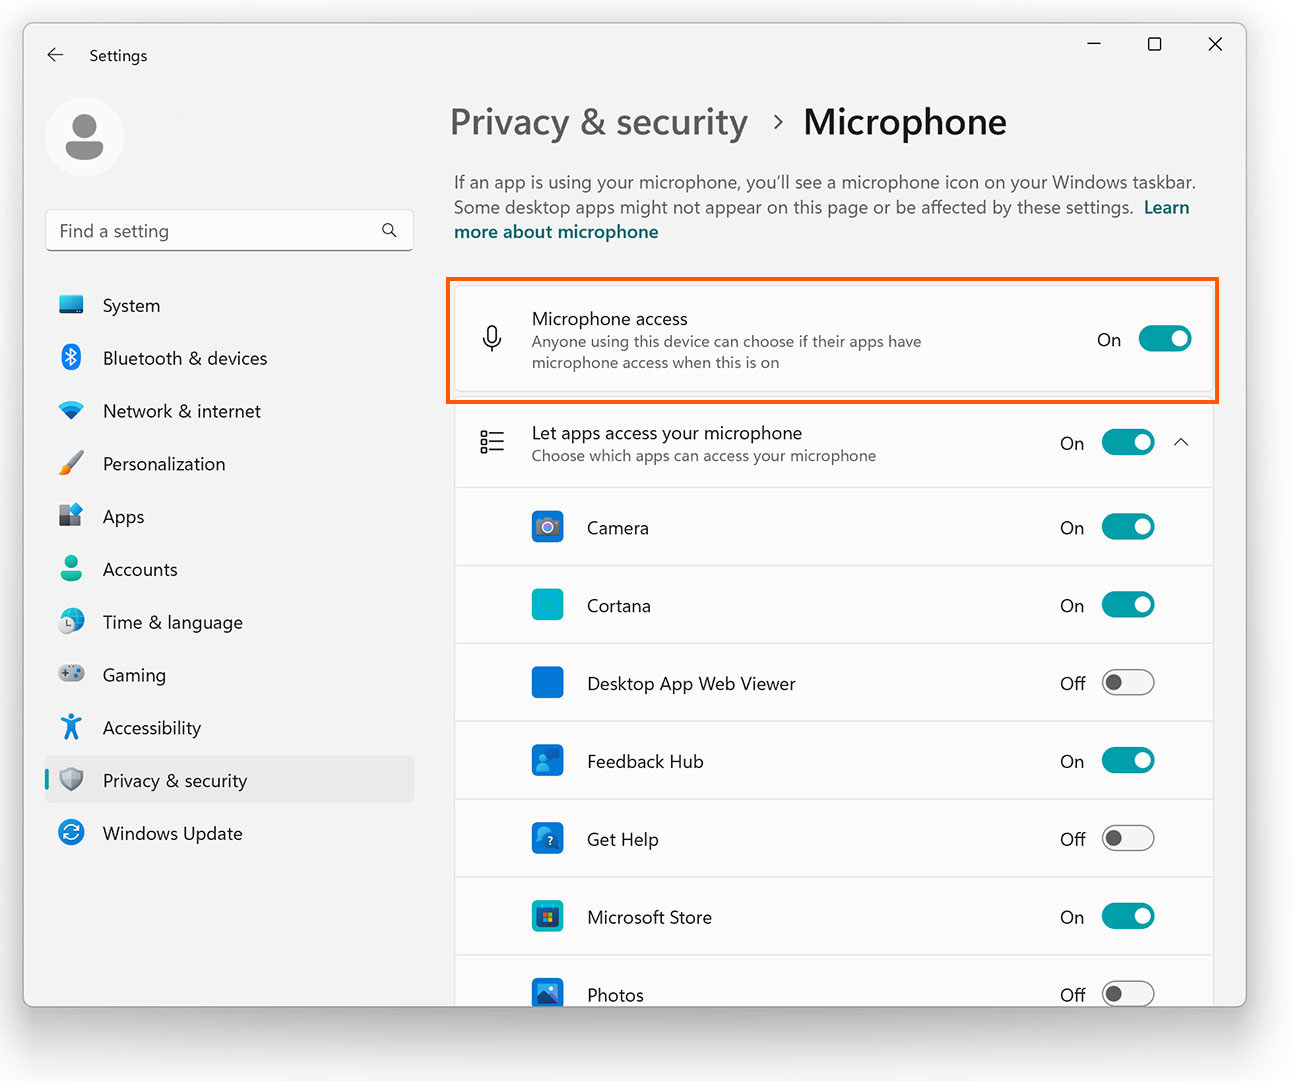
Enable mic access
Activate these two option on top of the Microphone tab:
1. Allow access to the microphone on this device
2. Let apps access your microphone (below)
3
Let desktop apps access your microphone
In the same Microphone tab (2.), scroll down and activate the option:
Let desktop apps access your microphone
VB-Audio Virtual Audio Device Mixing Console should appear below this setting.
Don´t forget to check:
VoiceMeeter needs to be your Windows 11 default audio device
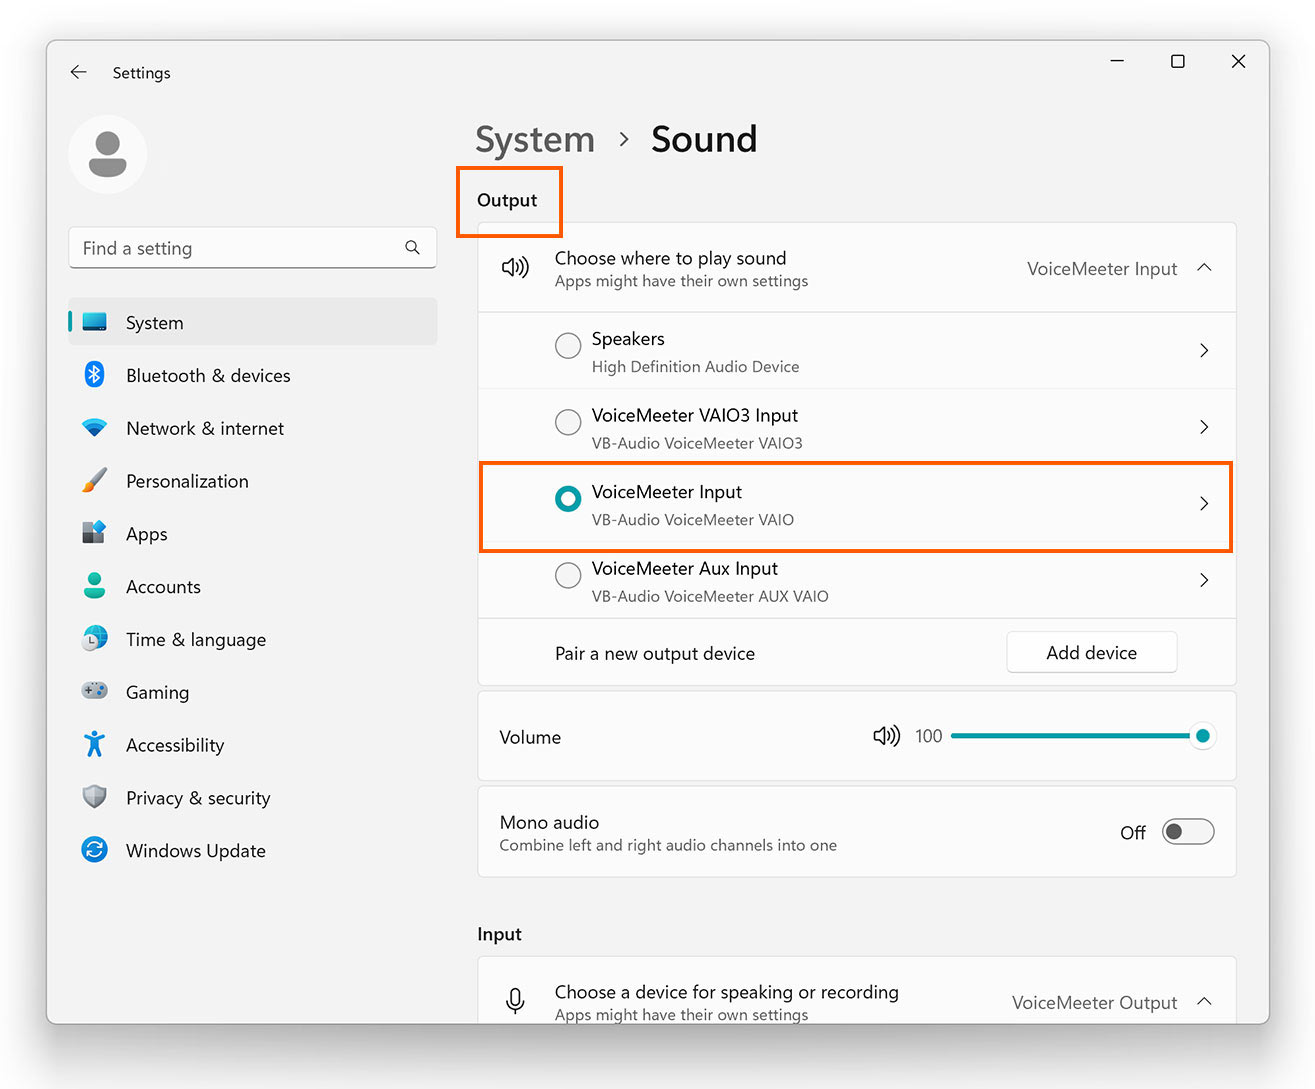
SET VOICEMEETER AS YOUR DEFAULT OUTPUT DEVICE.
Select VoiceMeeter Input (VB-Audio VoiceMeeeter VAIO) in the Output section.
All Windows sounds are now routed to VoiceMeeter’s software input 1 and can be mixed.
If you choose VoiceMeeter AUX Input (AUX VAIO), all sounds are routed to VoiceMeeter’s software input 2.
SET VOICEMEETER AS YOUR DEFAULT OUTPUT DEVICE.
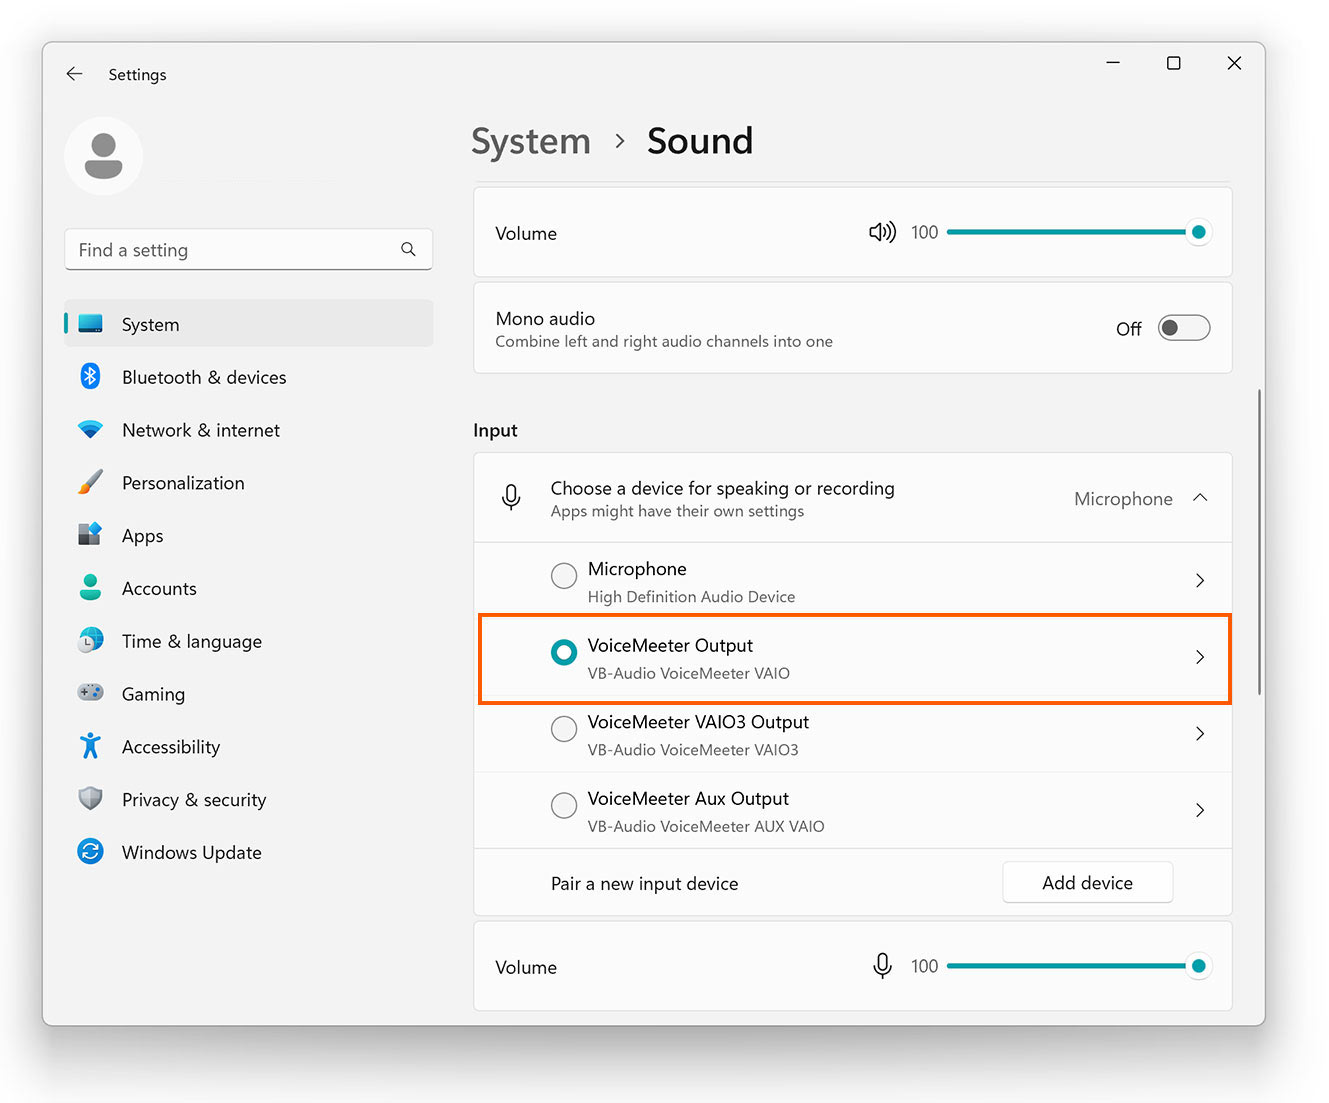
In the Tab System > Sound:
Select VoiceMeeter Output (VB-Audio VoiceMeeeter VAIO) in the Input section.
VoiceMeeter’s software output 1 with your mix are now routed back to Windows. This will only work, if you “Allow access to the microphone” in the Windows 11 Privacy & Security settings (see above).
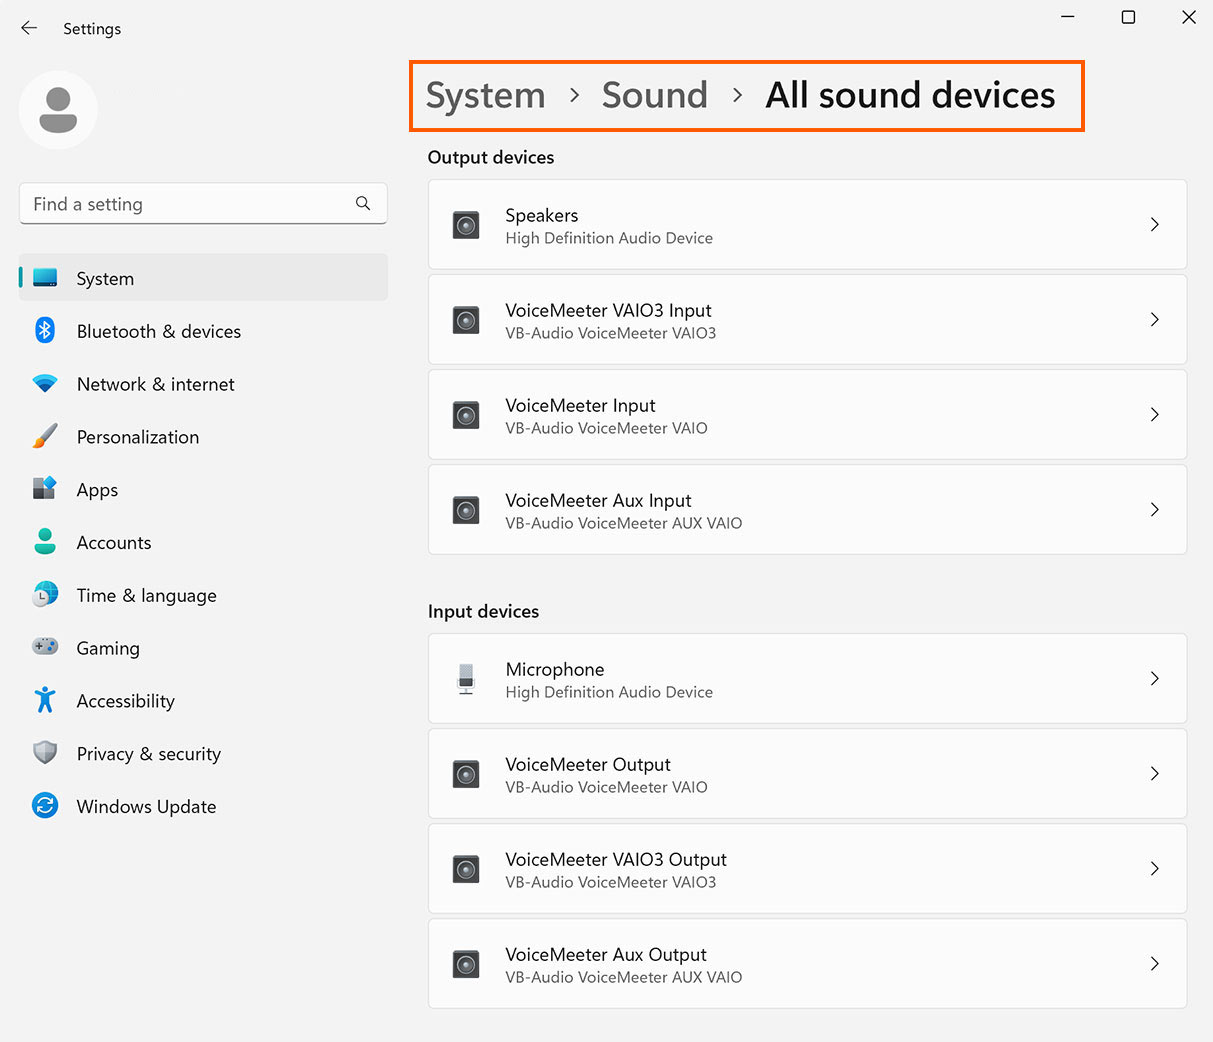
If your VoiceMeeter devices don´t show up in the Input & Output sections:
1. Scroll down to the Advanced Section (System > Sound)
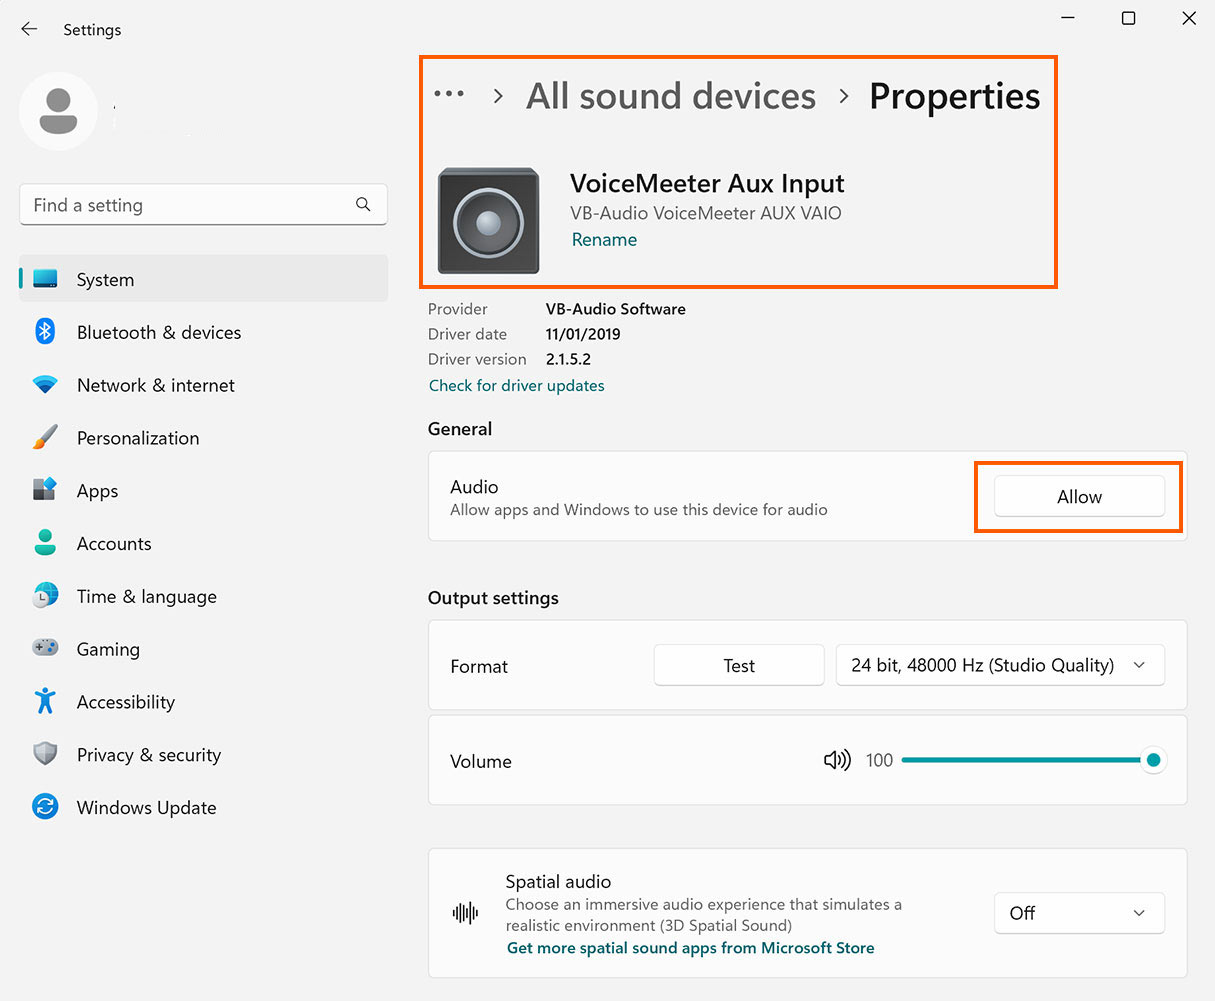
2. Select: All Sound devices and click on the device name, which is not showing up
3. In the sound device window click on the “Allow” button to activate the device.
The device will now show up in the System > Sound > Input or Output sections.

