Setup VoiceMeeter
for your Mic, Headphones
and Skype, Zoom or Discord
Setup VoiceMeeter
for your Mic, Headphones
and Skype, Zoom or Discord
Learn how to
1. Use VoiceMeeter to connect several audio sources:
- Your Microphone (e. g. USB Headset)
- A TV, external CD player or another
- Conferencing softwares, like Skype, Zoom, Discord
2. Use VB Audio Cable to connect your conferencing apps to VoiceMeeter´s hardware input. Use IntelliPan and Audibility to improve these sounds.
3. Split the different signals/sources to different outputs (Headphones, Speakers, software apps). Record all your signals or only one into a recording software.
THE SETUP
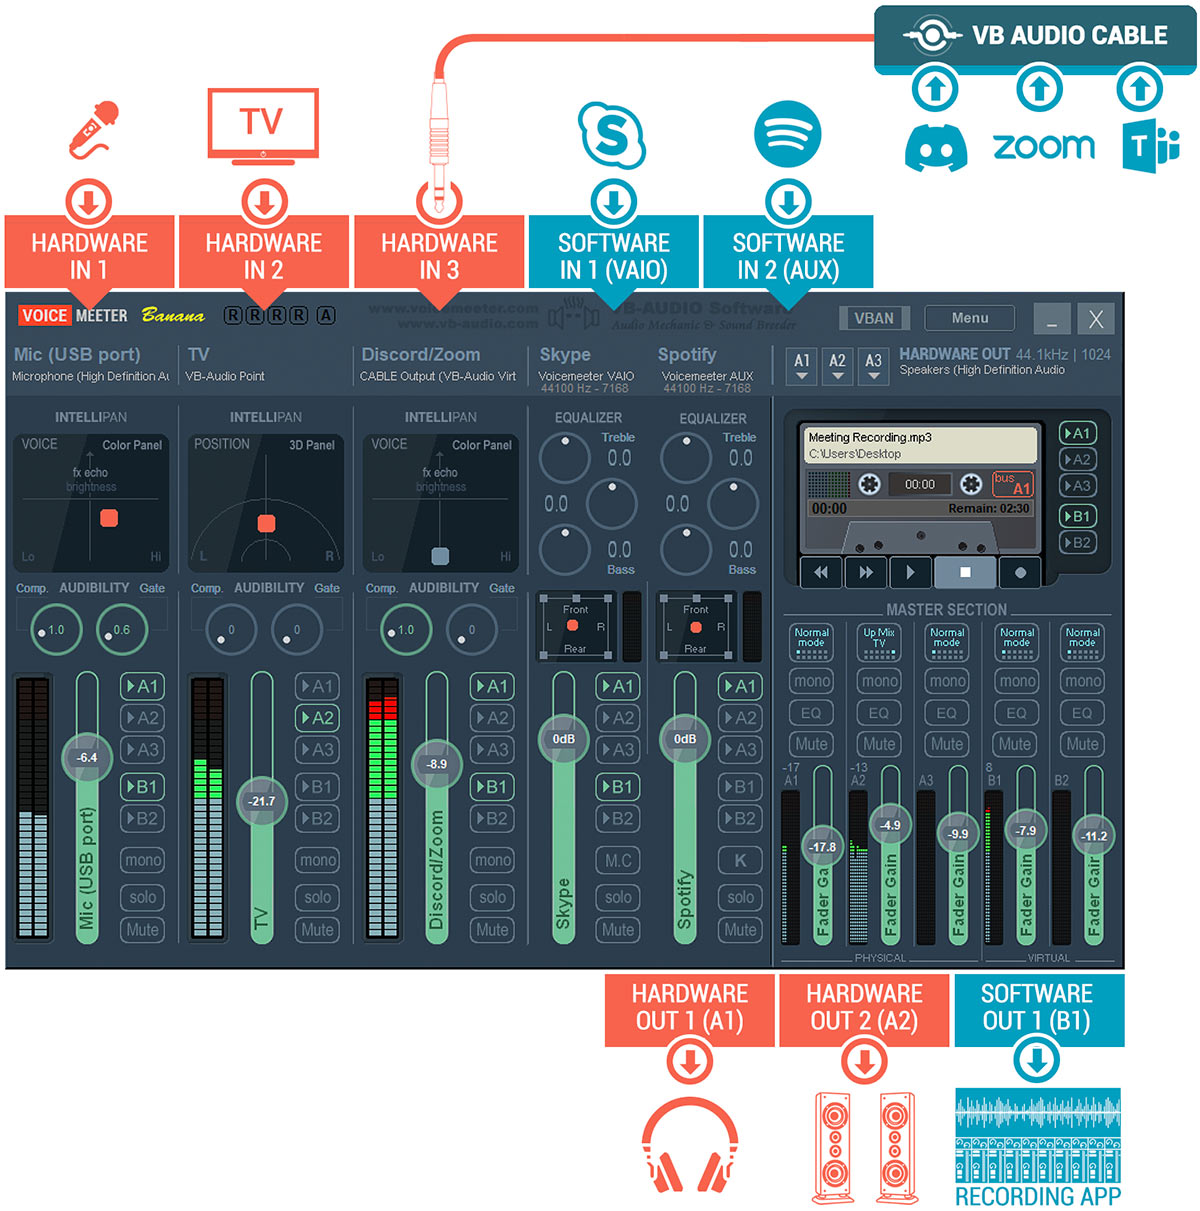
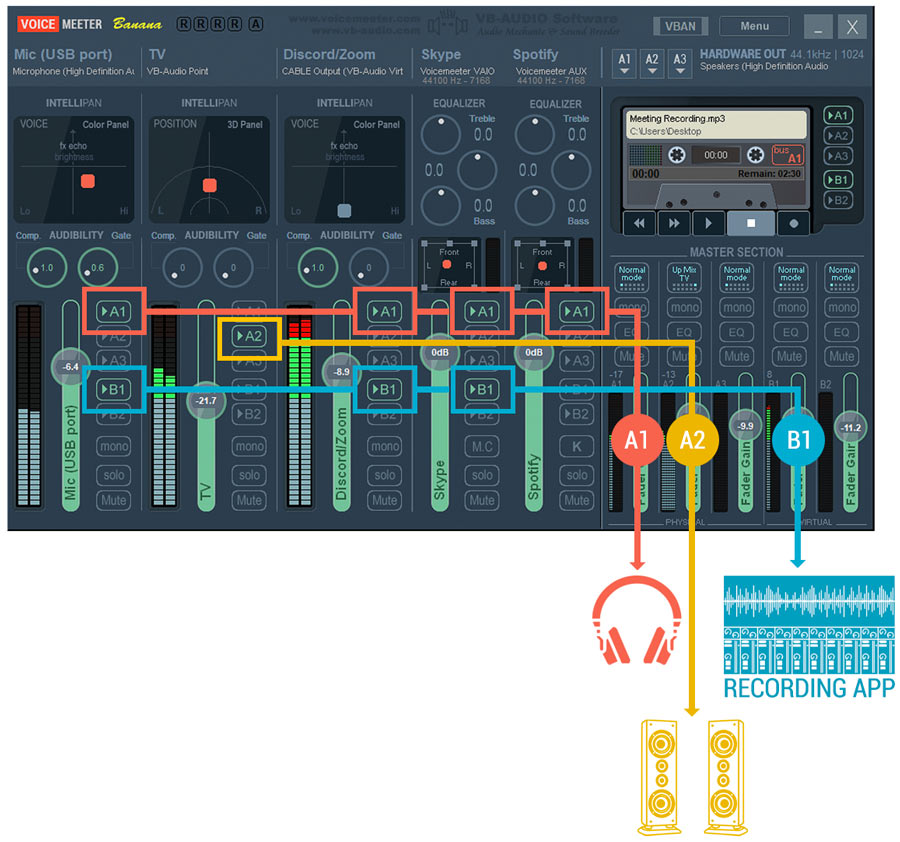
The Guide will explain how to create this setup with VoiceMeeter Banana:
- Mic, external audio (TV) on the Hardware Ins 1/2.
- Several apps with VB Audio Cable on Hardware In 3.
- Two more apps on both software inputs.
- Headphones and Speakers on Hardware Outs A1/A2.
- Recording selected audio channels on Software Out B1.
All elements are flexible, so you can change to other apps.
1
SET VOICEMEETER AS YOUR DEFAULT PLAYBACK AND RECORDING DEVICE.
Download and install VoiceMeeter Banana and VB Audio Cable. Reboot!
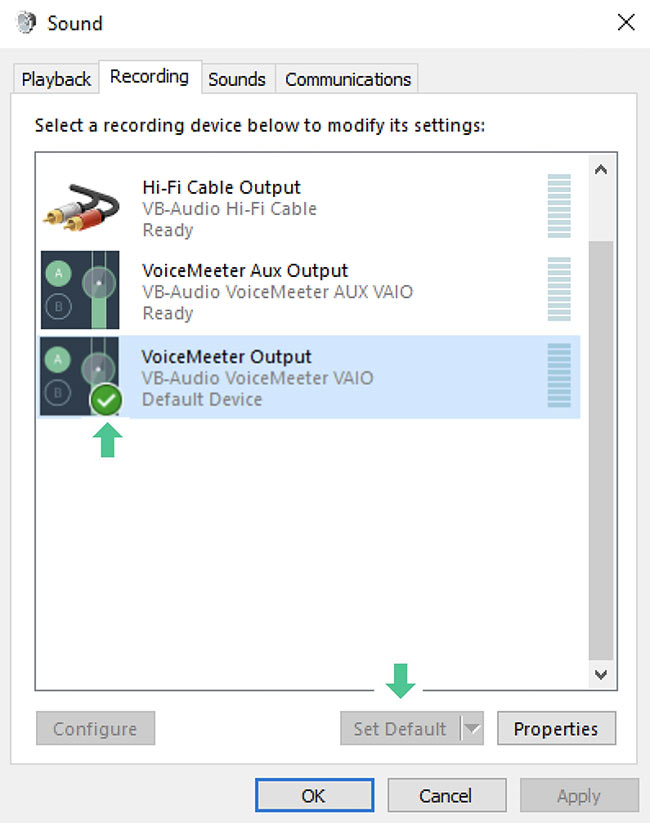
After successful installation, the Windows system audio device list includes a virtual VOICEMEETER playback and a virtual recording device.
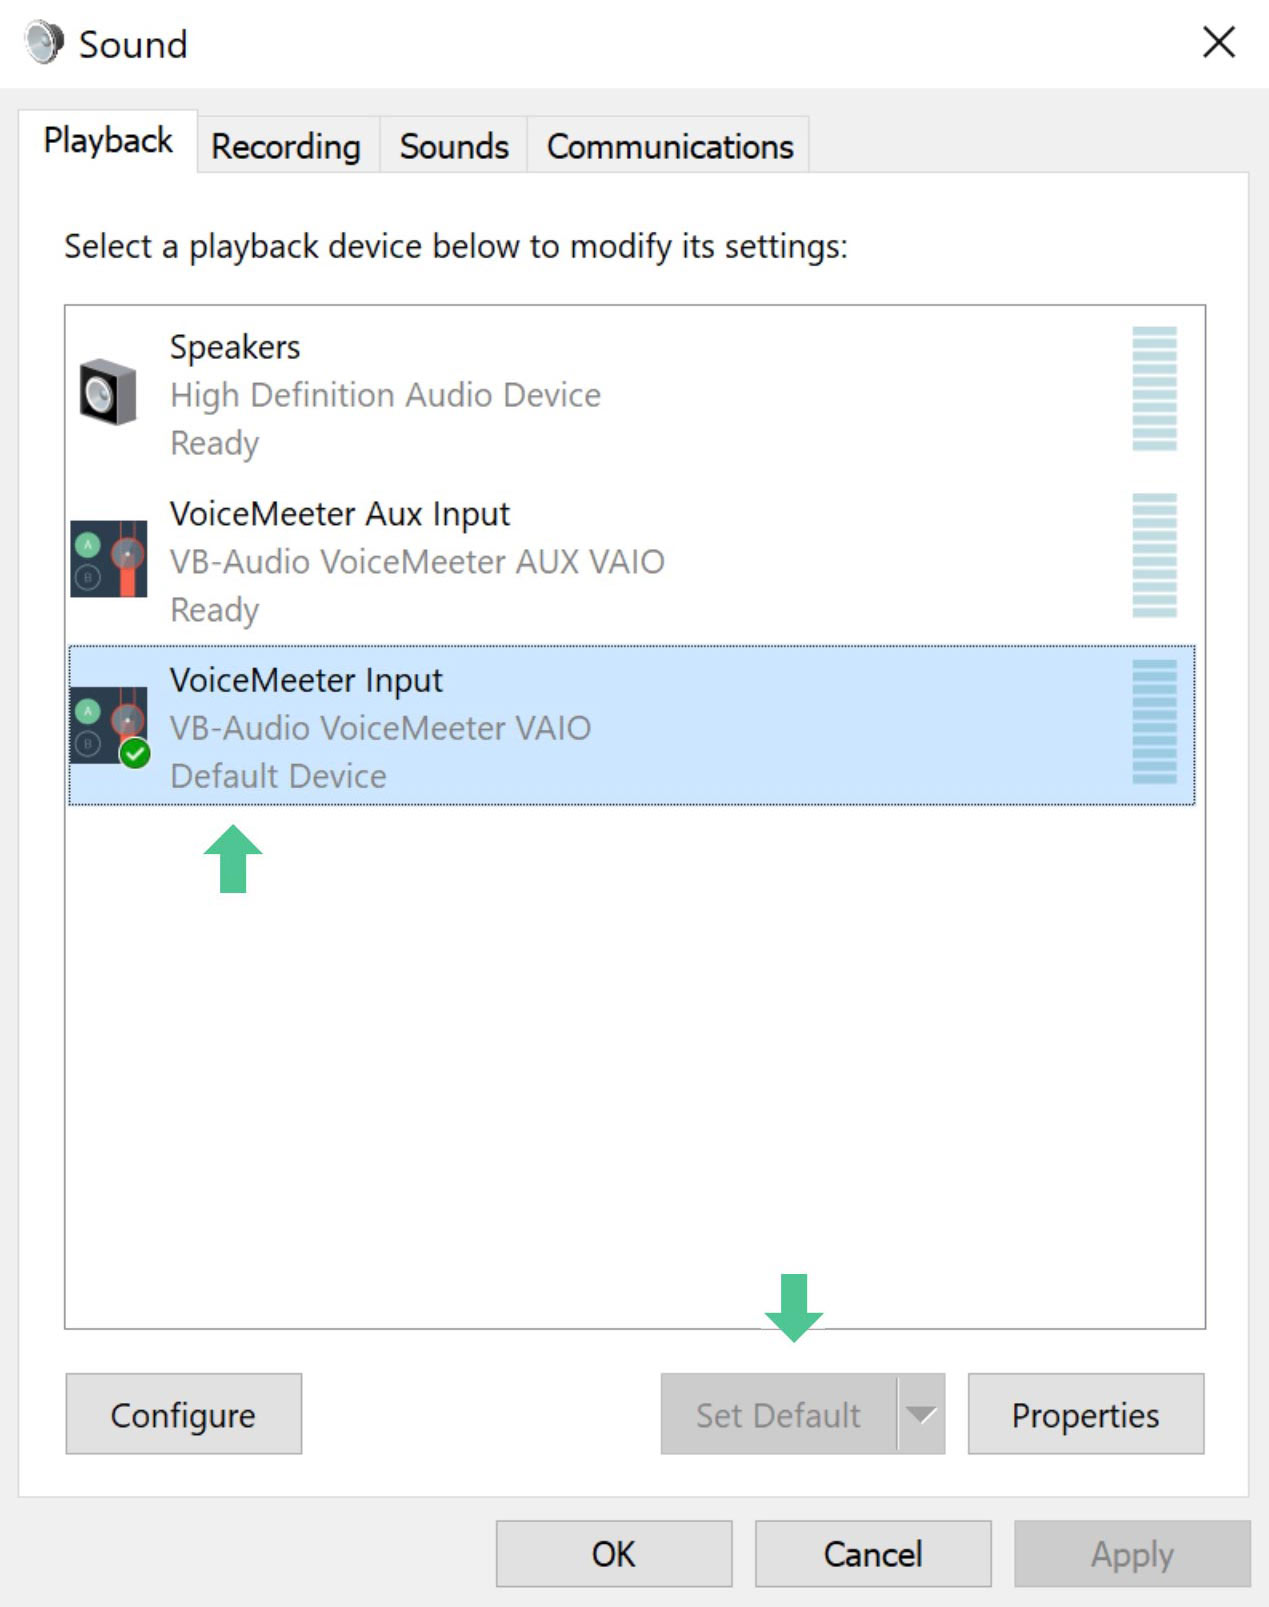
Set VB-Audio VoiceMeeter VAIO as your default Playback audio device.
![]()
You can find the Windows Sound Control Panel:
Settings / Sound / Related Settings / Sound Control Panel (Scroll down or on the right of the audio page)
VOICEMEETER has to appear with the VOICEMEETER icon, otherwise there is a possible driver installation problem (usually caused by Windows 10 updates).
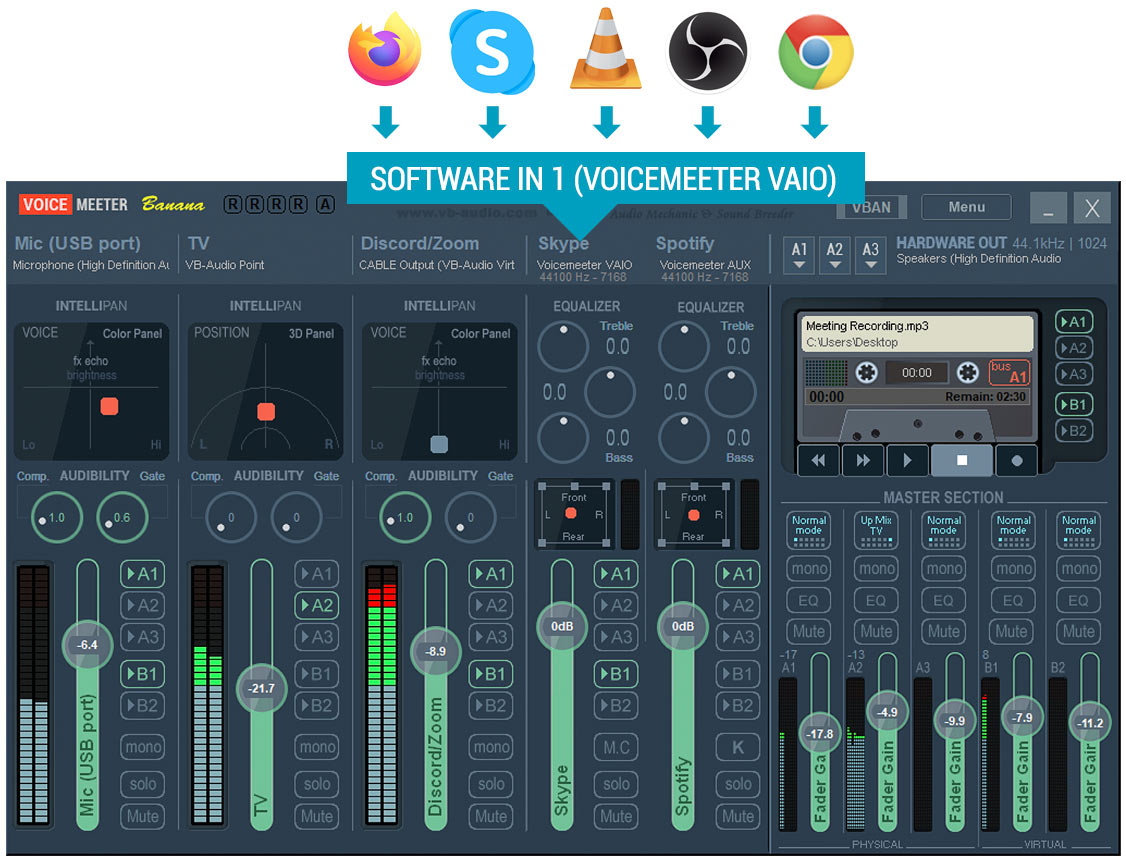
Every Windows audio will pass now through VoiceMeeter. This means, every app (e. g. Web browsers, Skype, Video …) will play on VoiceMeeter’s VAIO Input (= Software Input 1).
2
SETUP YOUR HARDWARE DEVICES
Connect and manage your Microphone, Headset, Speakers and other external audio devices.
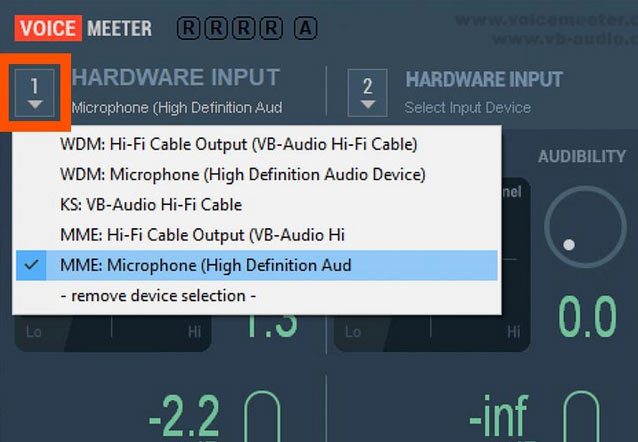
1.Select the device driver of your microphone from the input menu of Hardware Input 1.
Speak and check the microphone signal on the peak meter of your selected input strip.
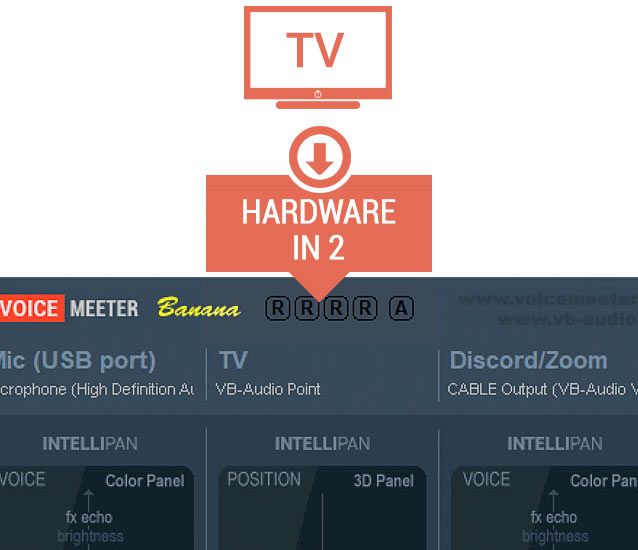
2.Connect an external audio device, e. g. your TV, to the audio input of the computer. If you are using a soundcard, plug the cable into an input port. Select the device driver of your computer audio or soundcard from the input menu of Hardware Input 2.
This way you can listen to movie sounds on your computer headphones or speakers. You can even use VoiceMeeter´s UpMix Bus mode to create Surround sound from the TV stereo signal (learn more).
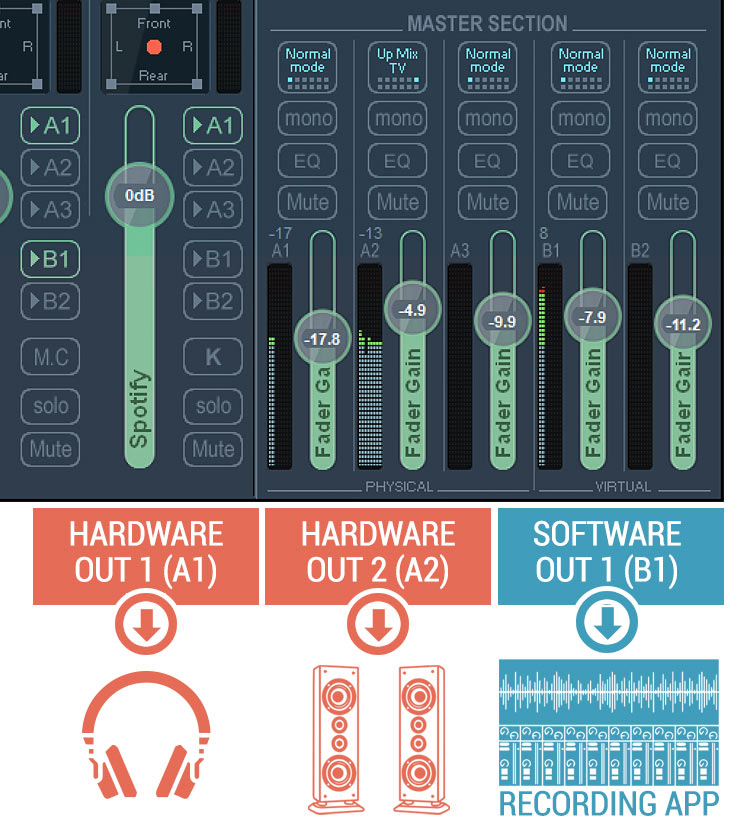
3.Assign your headphones to output A1 (WDM or MME driver – usually WDM provides a lower latency). Assign your speakers to output A2. Maybe assign small table speakers to output A3.
Why do you need different outputs?
Usually you want to listen to a Onine conference on your headphones, so your Microphone does not pick up the sound of your Skype contact and play it back to him or create feedback loop. This can happen, if Skype/Zoom or Discord sound is played on your speakers.
At the same time you want to use different volume levels or effects (e.g. Surround UpMix) on your headphones and speakers.
![]()
Your Mic or other audio hardware comes with its own driver(s). Select a WDM driver for the best latency and audio performance. A MME driver works too, but this format usually introduces more latency. Use an MME driver only if a WDM driver is not present or does not work correctly with your hardware configuration (e. g. crackles).
3
CONNECT SOME APPS VIA VB AUDIO CABLE TO A HARDWARE INPUT
Use VB Audio Cable to route selected apps to VoiceMeeter’s Hardware Input 3.
To connect software to a VoiceMeeter hardware input, you just need VB Audio Cable.
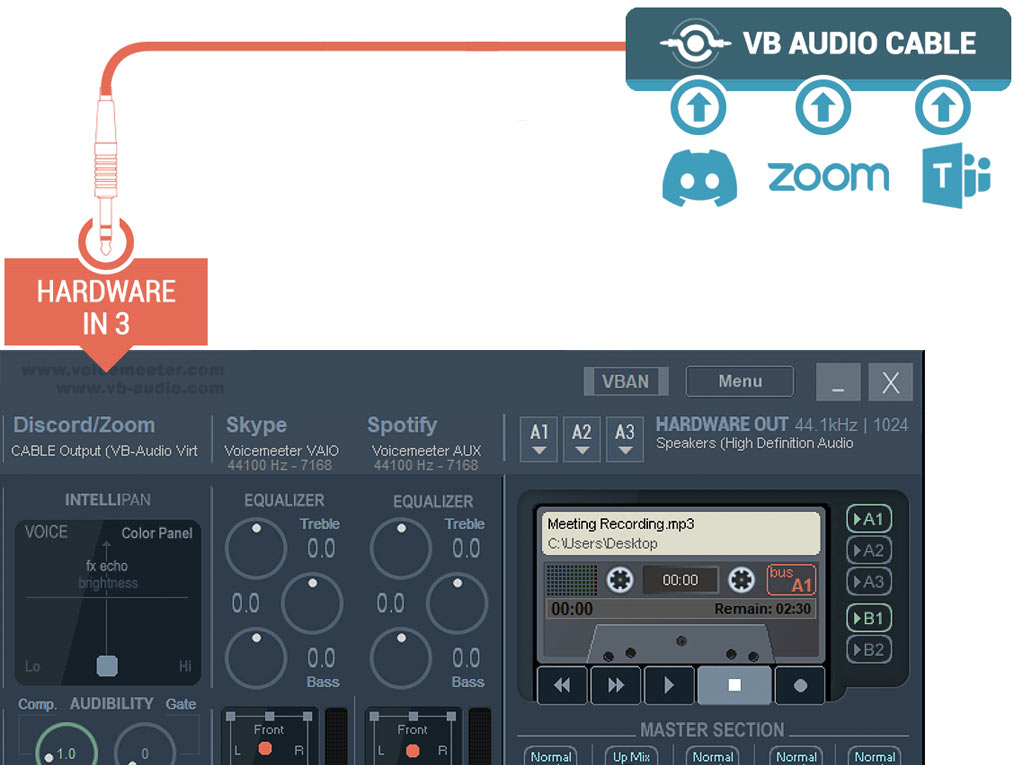
It works like an audio cable in the real world – the audio of Zoom, MS Teams or Discord goes to the input of VB Audio Cable, which is “plugged” into the hardware input of VoiceMeeter. Afterwards, it shows up as Windows audio device, which you can select for different apps to play on VoiceMeeter’s hardware input. In this way, it is possible to further split signals for playing on Headphones or Speakers or record them at the same time in another app.
1.Choose VB Audio Cable Input as audio device in every app, which should play on Hardware Input 3 of VoiceMeeter. (e.g. Zoom, MS Teams, Discord).
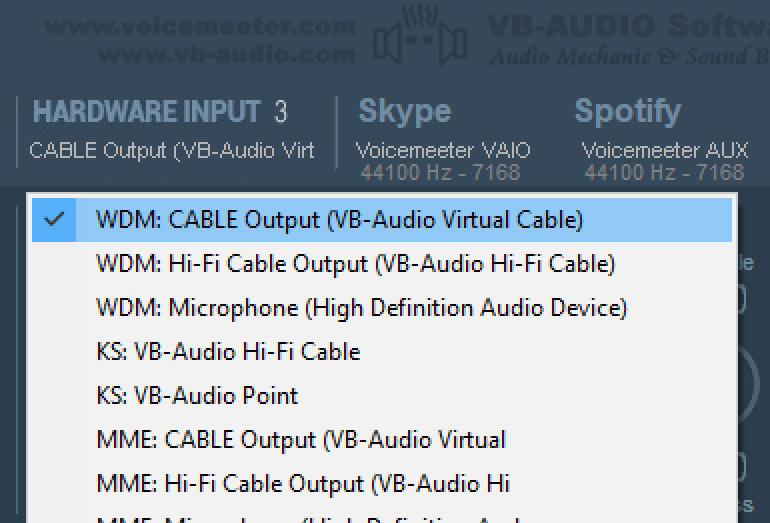
2.Select VB Cable Output on Hardware Input 3 of VoiceMeeter. Use the WDM driver version of VB Cable for the best performance.
3.You can use VoiceMeeter’s additional software input (AUX) for another signal, which you want to separate from other audio sources. For example, choose Spotify to play music on a dedicated VoiceMeeter channel strip (Software Input 2 = VoiceMeeter AUX).
![]()
VB Audio Cable is a so called Multi-client audio driver. This means you can assign several programs to the same VB Cable input.
Usually you only use one app at a time. If you want to split different programs, like Skype and Discord to different VoiceMeeter input channels, to give them different effects or split and mute on of them, while the other(s) still play, assign them to VB Audio Cable Input (= Hardware Input 3).
4
ROUTE YOUR INPUTS TO BUSES.
RECORD THEM IN A SOFTWARE
Manage and separate your Microphone, TV and conferencing apps.
1.Now you can simply press button A1 (assigned to Output A1 = Headphones) on any channel to listen to the signals on your Headphones. Press button A2 to on any channel to listen to the signals on your speakers. This way, you can simply split signals to different destinations or even listen to them on several outputs.
2.Assign one of the virtual outputs (B1) of VoiceMeeter to your recording program (e.g. Audacity). Now you can play and record all inputs to Audacity by pressing the Button B1 in their channels. Your Mic on Hardware input 1, your TV sound on Hardware input 2, Skype/Discord on Hardware input 3, were all recorded at the same time in your recording software.

